How to Make a GIF in Photoshop
In this tutorial, we will go over how to make two types of GIFs: One that you animate yourself in Photoshop, and one made from a video using After Effects and Photoshop.
Animated GIF
1. Creating Frames
Open the file you want to animate in a blank Photoshop document. For this tutorial, we will be using an airplane PNG, but the same steps can be taken to do a hand-drawn animated GIF or animate a different photo.
To animate GIFs in Photoshop we use Layers as Frames. Copy and paste the image so that it creates multiple layers. For each Layer, move the image a little more than the previous layer, using the move tool at the top of the toolbox. To edit the rotation more precisely, use the settings at the top to adjust the rotation, position, and size.
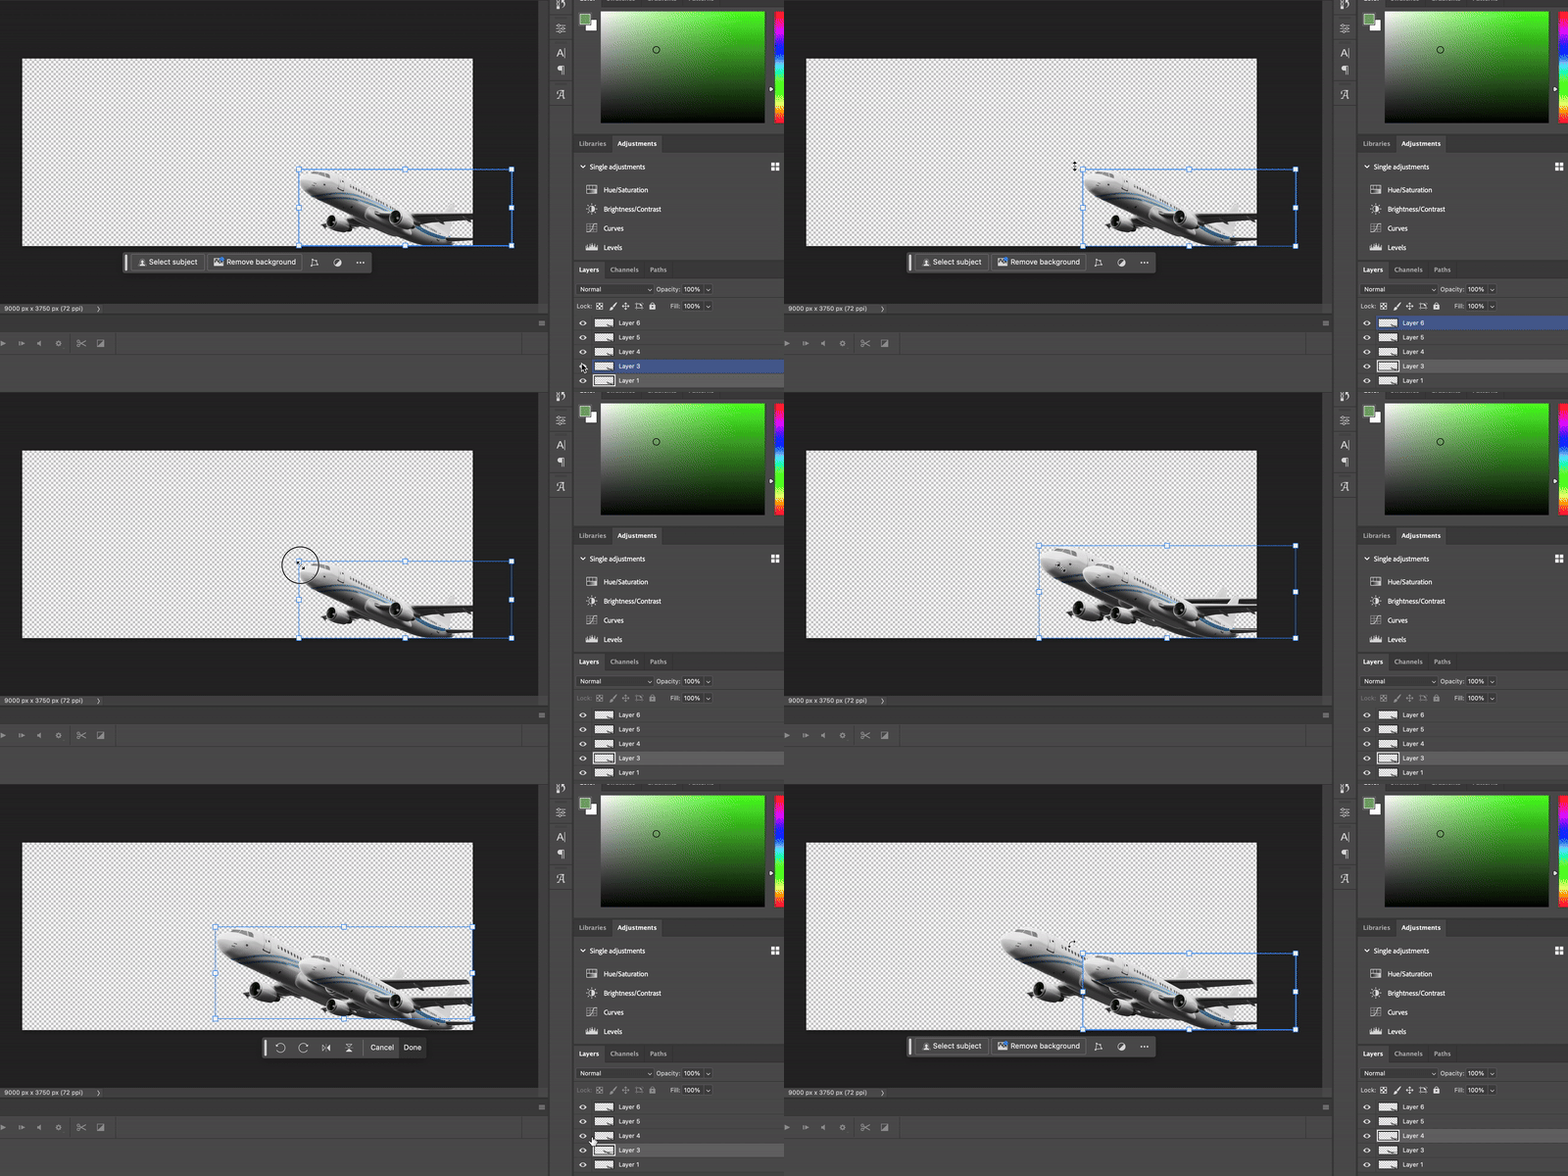
You can play with the opacity of each Layer in the Layers Panel to see the difference between Layers. This can function similarly to an “Onion Skin” if you are doing hand-drawn animation.
Repeat this process until you have about 7 iterations of your image–You can make more with smaller rotations for a smoother animation if you want. Make sure the last frame is what would occur right before the first frame, and not a copy of the first frame.
2. Animating the Frames
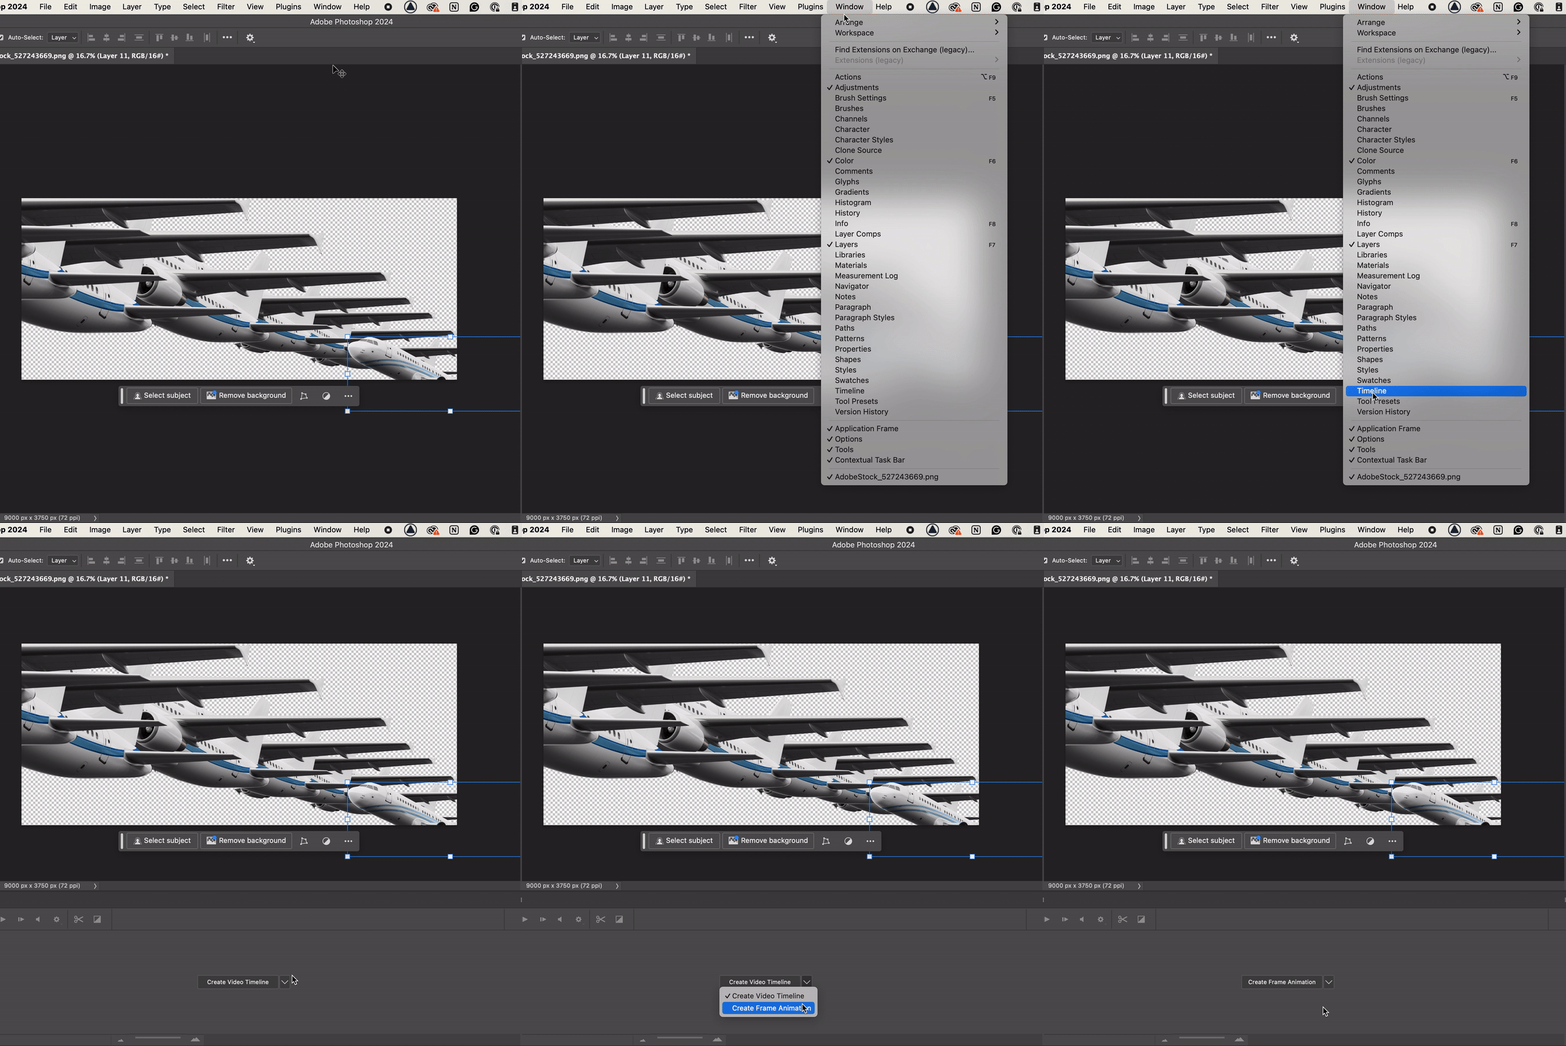
Now that we have all our Layers, we can animate. Go to Window > Timeline.
The Timeline window will open up at the bottom with a button in the middle saying “Create Video Timeline.” Click the arrow to the right of it and select “Create Frame Animation.” Click it.
Next, select your layers, then click on the icon with three lines in the top right corner of the Timeline window, and select “Make Frames From Layers.”
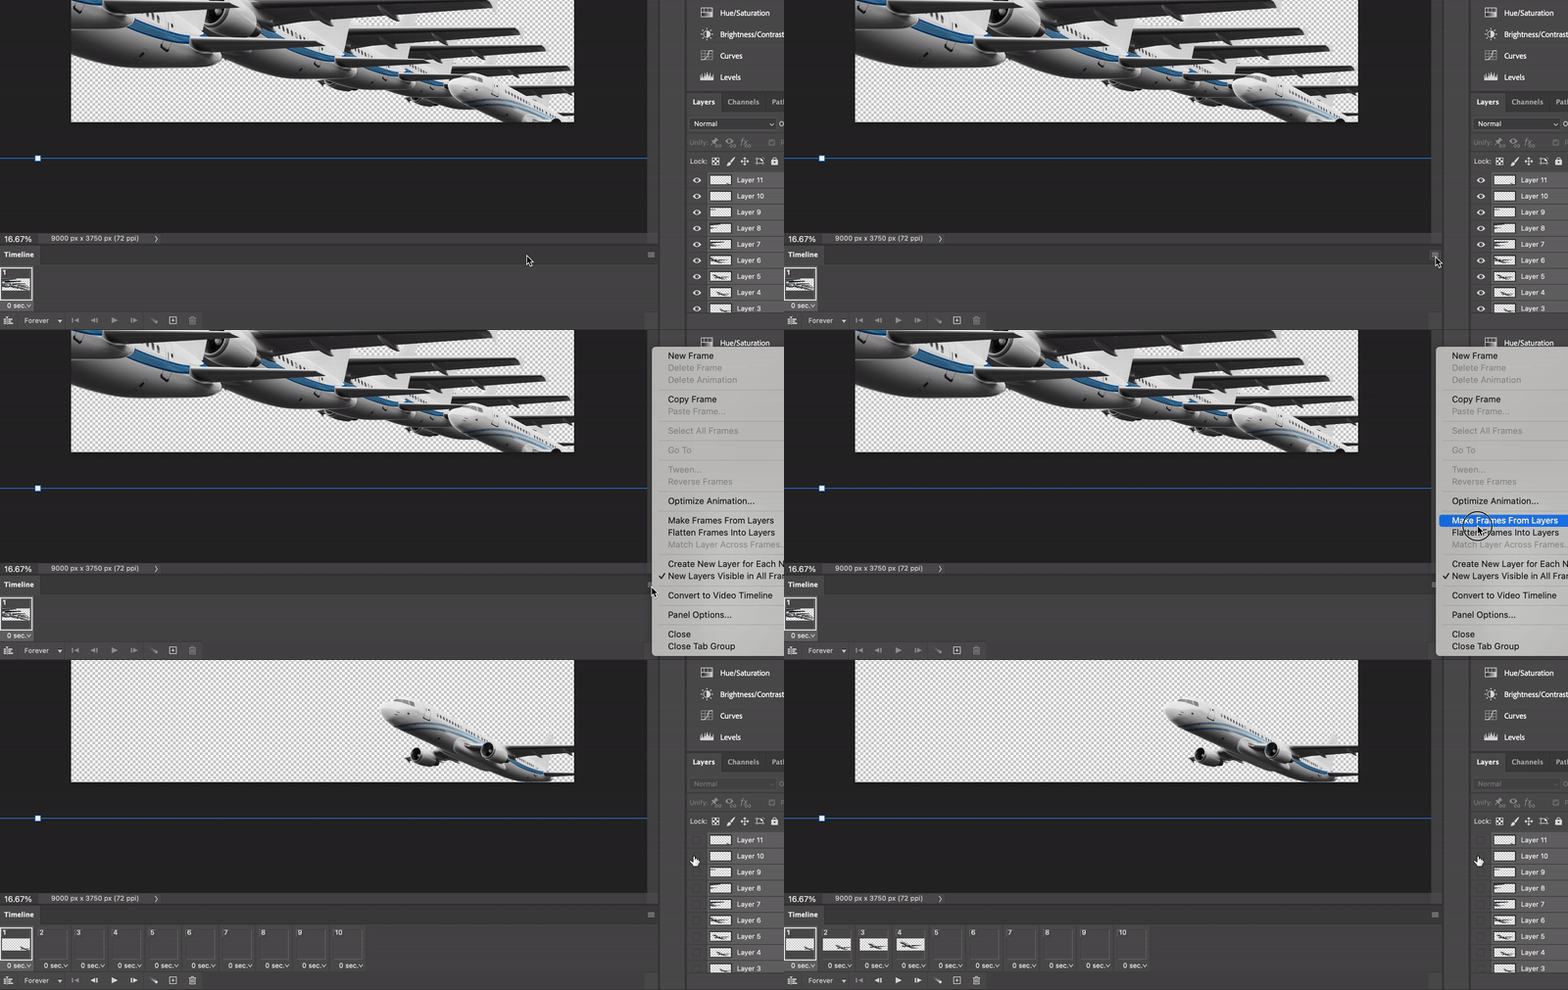
Your Layers will appear as Frames in the Timeline Window. If there is an empty, white frame at the beginning (like your “Background” Layer), select it and click the Trash icon in the bottom bar of the Timeline Window. If you simply click “Delete” on your keyboard, it may delete other frames by accident. Make sure to remove this extra frame, because if it is left it will interrupt your animation.
Click the “Play” button in the Timeline bar, and it will play your GIF:
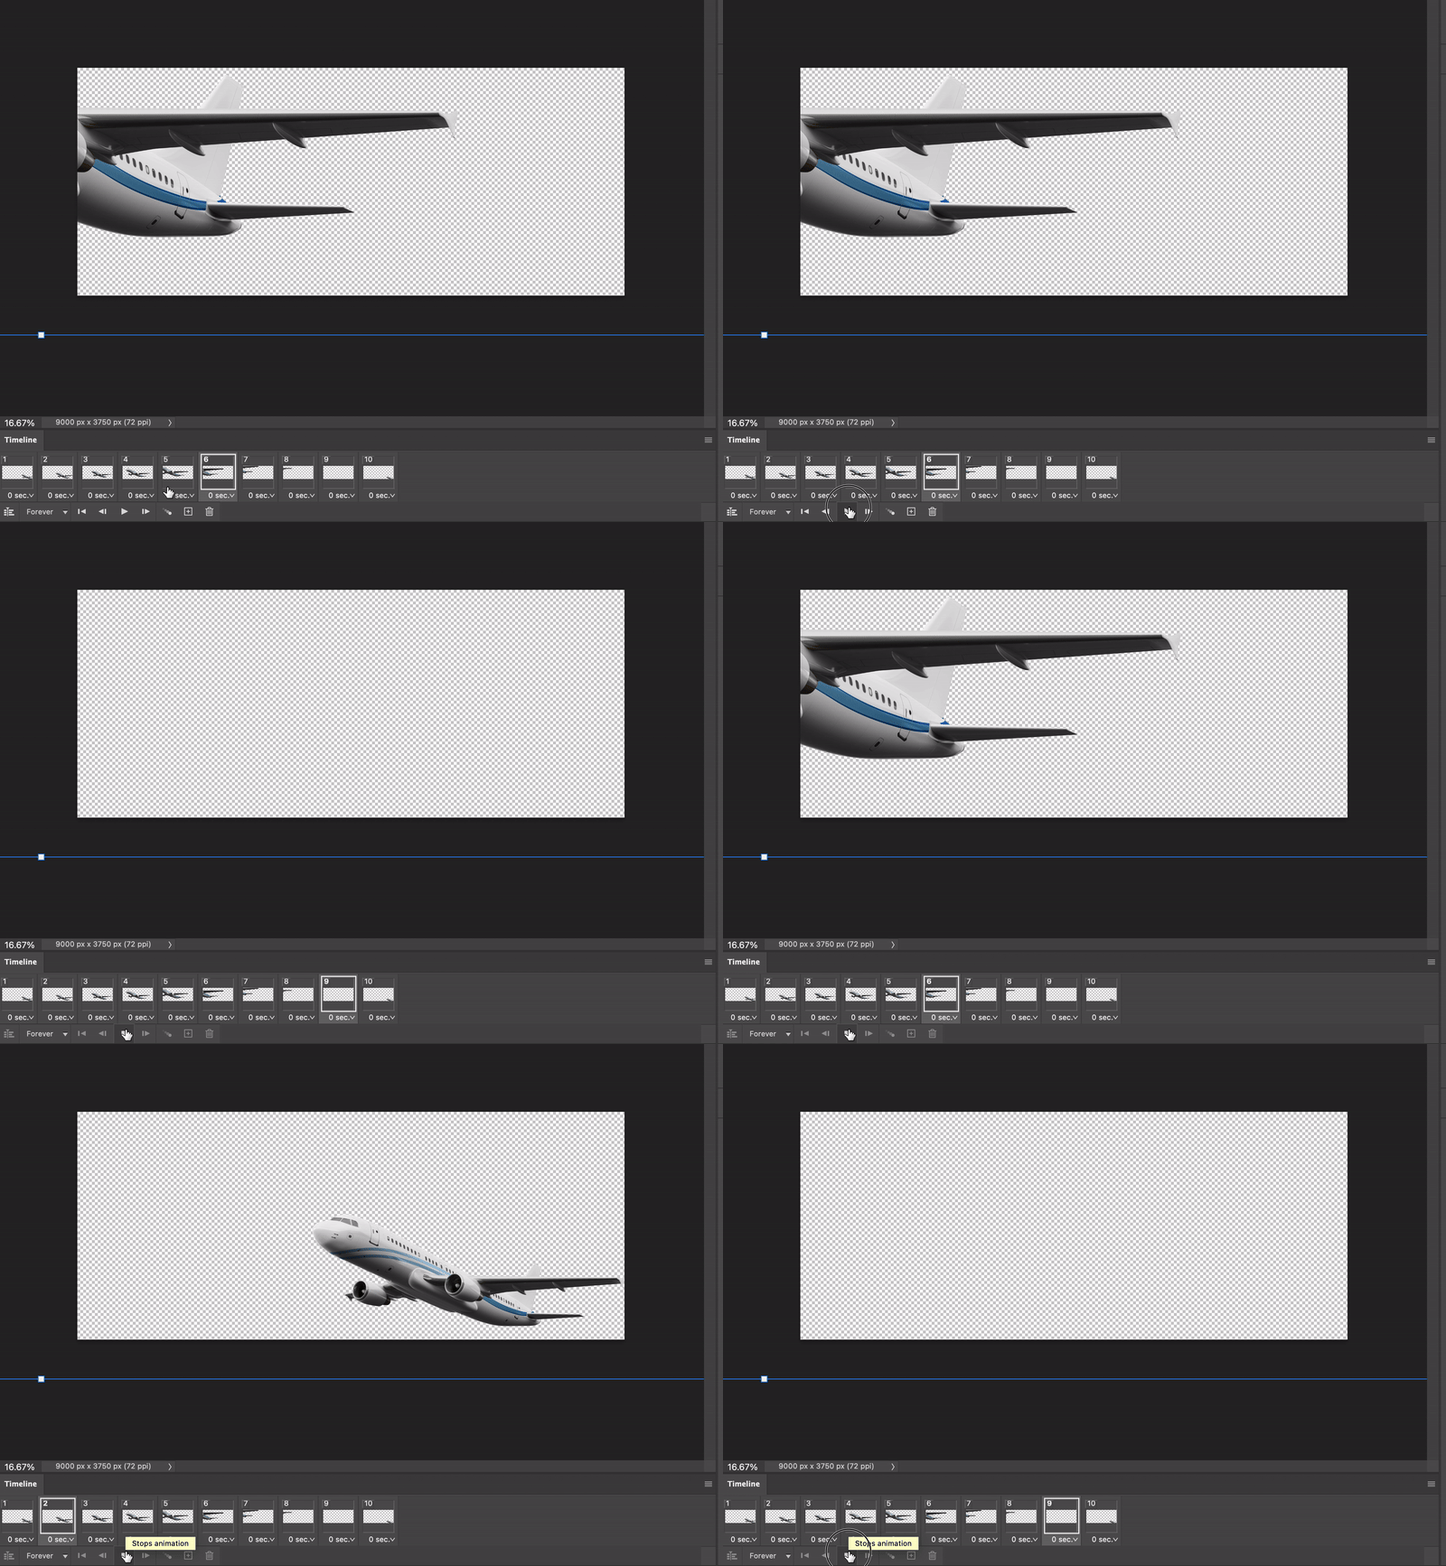
To alter the speed of the GIF, click the down arrow next to “0 sec.” You can alter the speed of each frame individually, or, to alter all of them, click the first frame, hold the Shift key, and click the last frame, then click the arrow in any of the frames.
The smaller the number, the faster the GIF. One Frame per Second will be fairly slow, 0.2 will be closer to the average GIF, and 0.00 will be the fastest.

3. Export as a GIF
To save as a GIF, go to File > Export > Save for Web (Legacy)

A new window will pop up, and GIF will be the default format option! You can mess with the sizing and color preferences if necessary to make sure the file size isn’t too big, but with a short, 7-frame GIF as this one, it shouldn’t be necessary.

Check at the bottom of the settings where it says “Looping Options” and make sure it’s set to “Forever” and not “Once.”

If you click “Done” it will save whatever changes you made in this window, but won’t save your GIF file. Click “Save” and choose where to save your GIF.
Your GIF is complete!
Want to learn more about Photoshop? Take a look at our Photoshop tutorials!


