

Create an Interactive Web Timeline with TimelineJS
TimelineJS is an open-source web application for building beautiful, interactive timelines. You can create your timeline using a Google Sheet or JSON file. TimelineJS supports various media types, including images, videos, audio, Google Maps, Wikipedia pages, and more.
In this tutorial, we’ll cover how to create your timeline with a Google Sheet.
Create Your Timeline
To create your timeline:
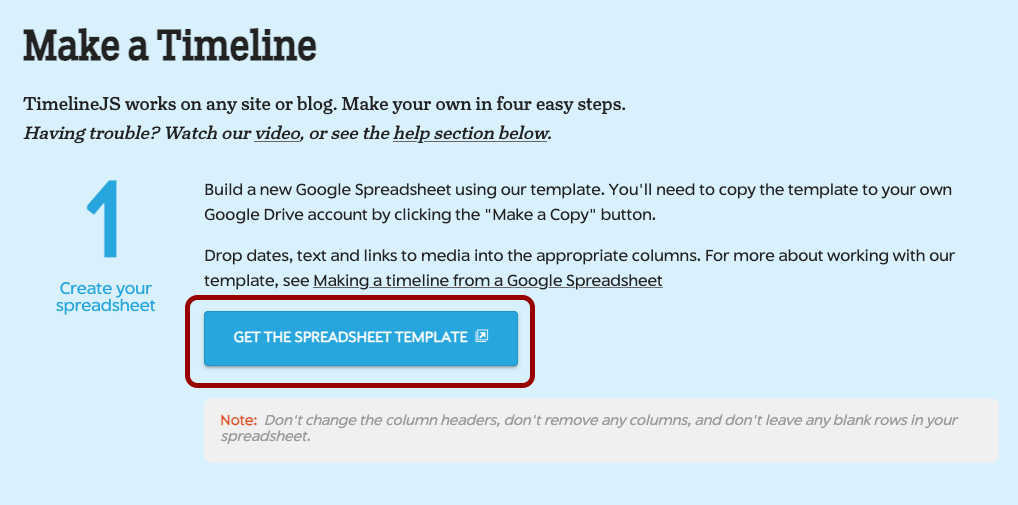
- Go to Knight Lab’s TimelineJS webpage.
- Click Make a Timeline.
- In the Make a Timeline section, click the Get the Spreadsheet Template button.
- On the new tab that opens up, click the Make a copy button.
- If prompted, log in to your Google account.


Edit Your Timeline
Add Events to Your Timeline
The copied spreadsheet template opens in Google Sheets, where you’ll add all the content for your timeline. Each column has a heading that describes the content you put in the following rows. The first row, highlighted in blue, is the title slide and does not need a date. Each subsequent row represents one event in your timeline.

Each event must have a start date, represented by the columns whose headings are highlighted in red. If the event spans several dates, you can include an optional end date, represented by the columns whose headings are highlighted in gray.
The Display Date column can be used to override the default Timeline JS date formatting method.

Values in the Headline column specify the title of the event, while values in the Text column specify a description of the event.

Add Media Elements to Events
Various media types can be embedded in the timeline, as long as the media files live on the internet. For a full list of available media types, check out the Media Types page on the Timeline JS website.
If you have your own media that you wish to embed in your timeline, we recommend first uploading it to an online platform including:
- Flickr for images
- Vimeo or YouTube for videos
- SoundCloud for audio
Once you’ve uploaded your media to an appropriate online platform, copy the share URL and paste it in the Media column to display the content.
You can further customize the media in your timeline by providing values in the following columns:
- Media Credit: provide credit to the media creator, including yourself
- Media Caption: specify text to appear below the media
- Media Thumbnail: provide an image file link to create a thumbnail (not recommended)
- Alt Text: specify text for screen readers and search engines to better understand the media

Customize the Appearance of Timeline Slides
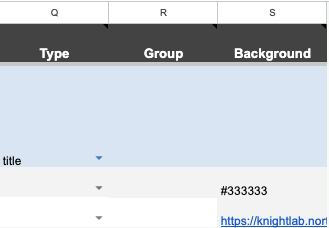
The Type column allows you to configure “era” slides, which display only the Headline and Text columns. These slides are helpful to break up longer timelines.
Provide a value in the Group column if you’d like to group several events together and indicate they’re related to each other.
Enter a hexadecimal color code or an online image link in the Background column to specify a color or image to appear in the background of the event.
Publish Your Timeline
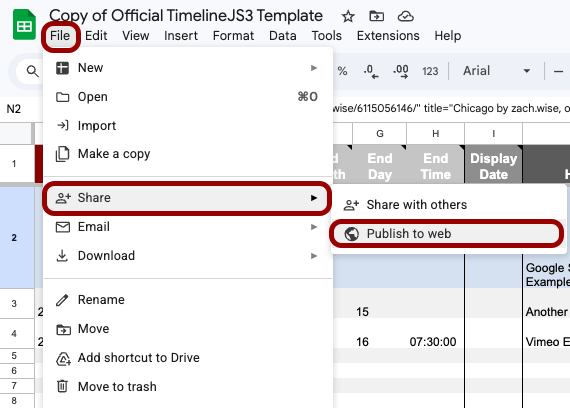
At any point while you’re creating the your timeline, you can publish it to see how it looks. In your Google Sheet:
- Click File.
- Click Share.
- Click Publish to web.
In the Publish to the web popup, click the Publish button.
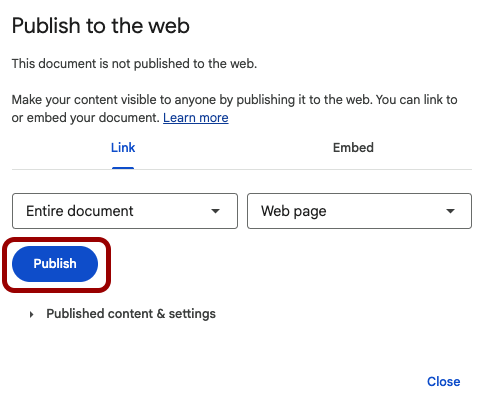
If your browser prompts you to confirm you want to publish the Google Sheet, click OK.

Back in the Publish to the web popup, copy the link that appears in the text box. Timeline JS uses this URL to generate your timeline.
Additionally, you can click the Published content & settings button and ensure the Automatically republish when changes are made checkbox is selected. This setting allows you to update your timeline data in the Google Sheet without having to go through the steps to publish the Sheet again.

Generate the Timeline
To generate the timeline:
- Go to the Timeline JS website.
- Scroll down to the third step in the Make a Timeline section.
- Paste the link you copied from the Publish to the web popup in the Google Spreadsheet URL field.

You can also specify the width and the height of the generated timeline.
Add Your Timeline to a Website
After you’ve entered your Google Sheet URL, Timeline JS creates your timeline and generates an embed code in the Share your timeline section of the webpage. Copy this code to embed the timeline in your website.

WordPress Website
To embed your timeline in a WordPress website:
- Open the post or page in the WordPress editor.
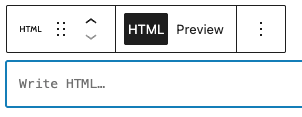
- Add the Custom HTML block.
- Paste the copied embed code in the Write HTML… text entry field.

Coded Website
To embed your timeline in a coded website, paste the copied embed code in the HTML file of the page on which you want the timeline to appear:
<body>
    <!-- paste embed code here -->
</body>
Want to make a custom background for your timeline? Check out our Making a Background Pattern in Illustrator tutorial!