
Intro to WordPress
WordPress is the world’s most popular content management system (CMS), power over 43% of all websites on the internet.
In this Intro to WordPress tutorial, you’ll become familiar with the basics of WordPress, including how to:
- Decide between WordPress.org and WordPress.com sites
- Set up your website
- Add pages and posts
- Customize your website design
- Configure settings
Decide Between WordPress.org and WordPress.com
There are two services you can use to create a website using the WordPress CMS: WordPress.org and WordPress.com.
WordPress.org is a self-hosted service, meaning you purchase a hosting solution and then install the WordPress software on the website hosting plan. Common web hosting providers include GoDaddy and Bluehost.
WordPress.com is a hosted service, meaning that the WordPress company hosts your website and provides the WordPress software to edit your site.
While the core functionality remains the same between the two services, there are differences in the maintenance and the customization capabilities. If you’re looking to have full control over your website, including the maintenance, we suggest WordPress.org. However, if you want to avoid managing servers and only use simple features and customization, we suggest WordPress.com.
If you’re using a USC Annenberg-provided WordPress website for JOUR 414, PR 524/525, or PRSM 520/525, you receive a WordPress.org website.
Set Up Your Website
Set Up a WordPress.org Website
If you’ve chosen the self-hosted WordPress.org service, make sure you select WordPress Hosting from your hosting provider. Each hosting provider has a different set up process to creating your site, but each has technical support that can help you if you need.
Set Up a WordPress.com Website
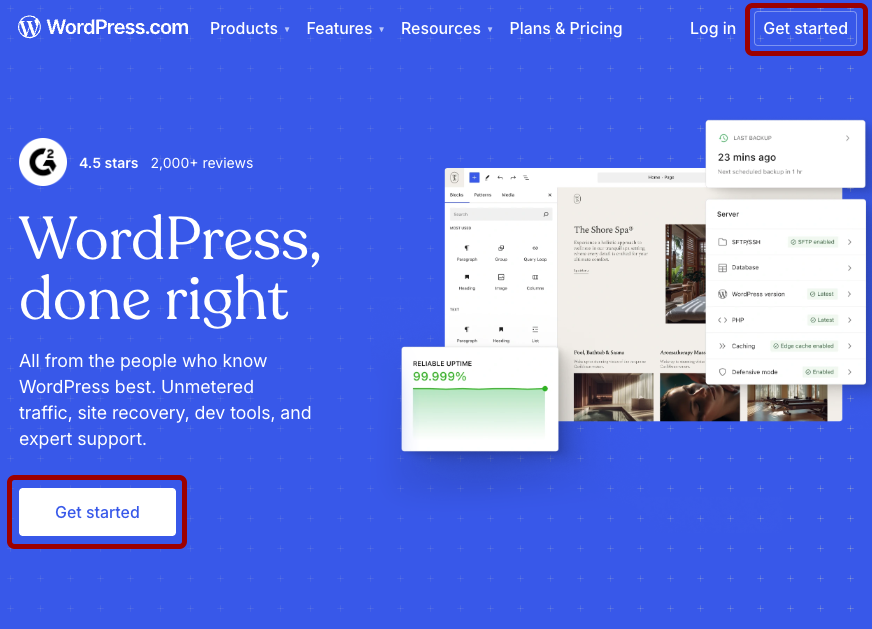
If you’ve chosen the hosted WordPress.com service, go to the WordPress.com website and click the Get Started button in the top-right.
On the Create your account screen, select how you want to sign in to WordPress.
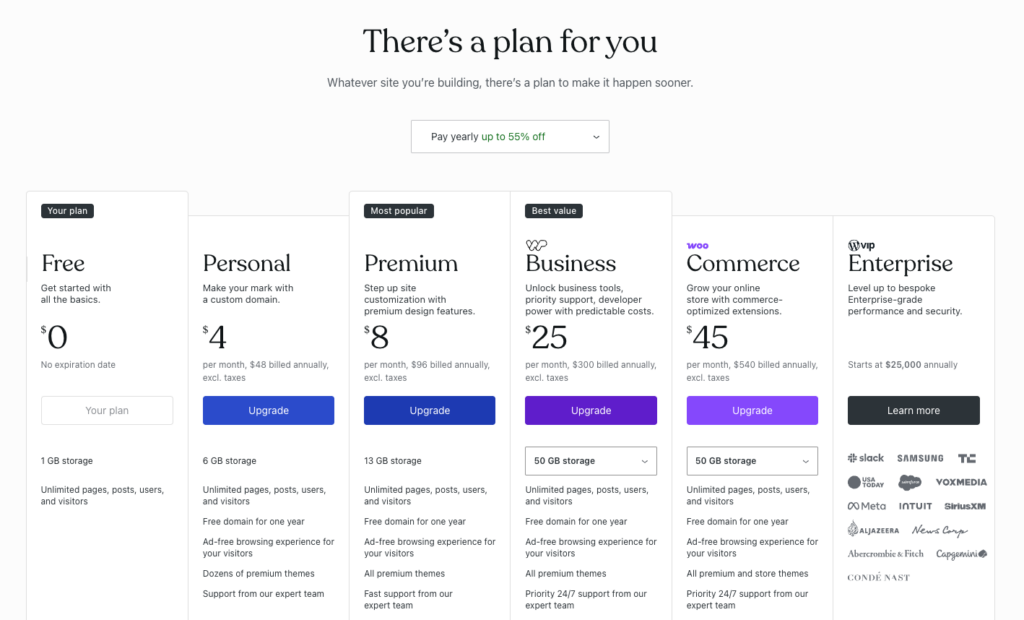
Select the pricing plan you want on the There’s a plan for you screen.
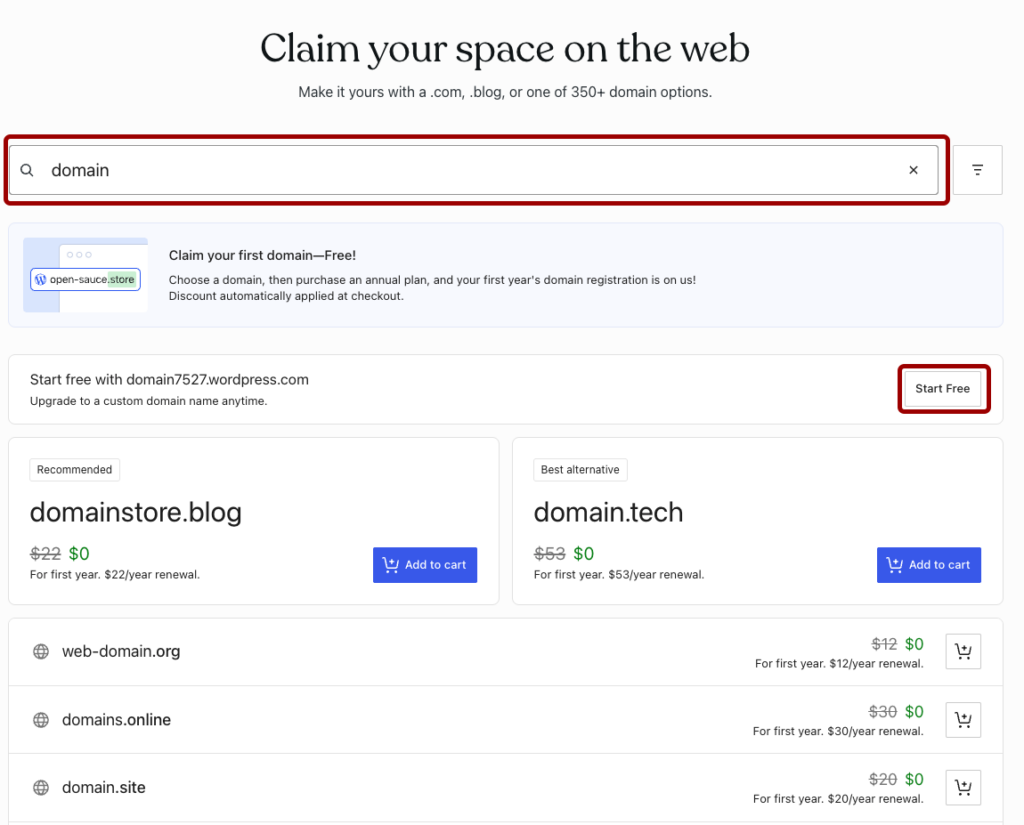
On the Claim your space on the web page, you can search for the domain name you want to use. There’s options to select a free domain or to purchase a custom domain.
Add Pages and Posts
Pages and posts are the primary ways to add content to your WordPress site. While the page and post editors look the same and have most of the same functionality, they serve different purposes on your website.
Pages are designed for static or evergreen content will always be relevant. For example, the “About Me”, “Resume”, and “Contact Me” pages of a portfolio website would be created as WordPress pages.
On the other hand, posts are designed for dynamic content that’s relevant to the time of posting. For example, the individual project web pages on a portfolio website would be created as WordPress posts. Unlike pages, posts can be organized by assigning categories to them.
In this tutorial, we’ll introduce how to create a post, but the process can be applied to pages as well.
Create a WordPress Post
To create a new post in WordPress:
- Click on Posts in the left-hand menu.
- Click the Add Post button near the top of the page.

Add Content to a WordPress Post
After you’ve created or opened a post, you can start adding content.
To specify the title of the post, type in the Add title field near the top of the post editor.
Most of the content you add in WordPress posts and pages are added through blocks. You can add a new block in three ways:
- Click the blue plus icon in the top-left.
- Click the black plus icon that appears inline.
- Type “/” and then the name of the block.
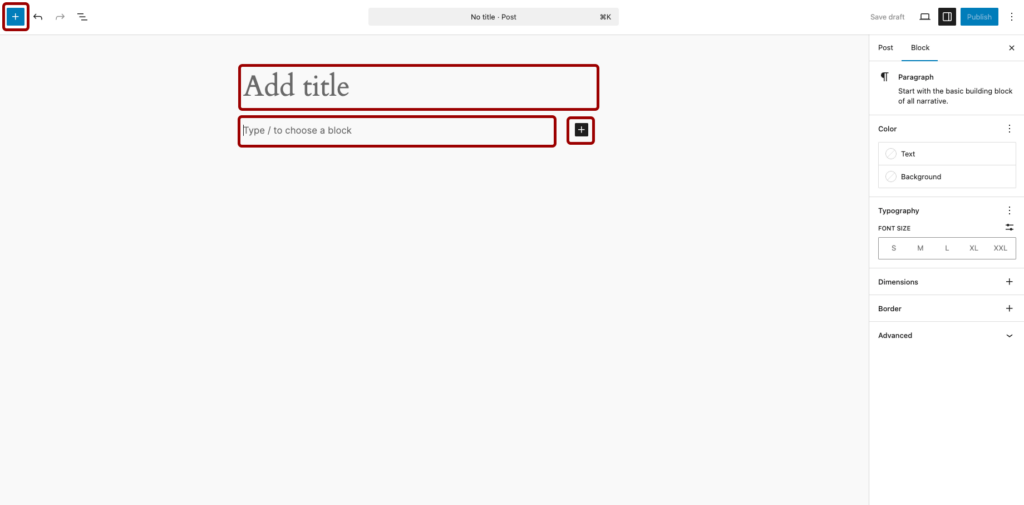
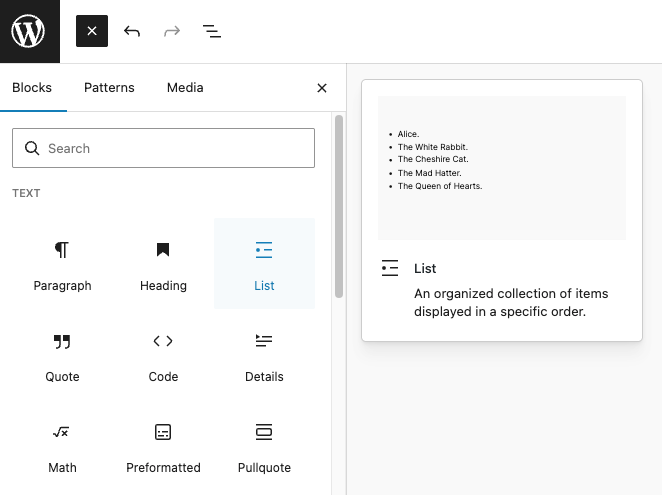
To see all of the content blocks available, click the blue plus icon in the top-left.
Hover over a content block to see a preview of what it looks like. Click on the content block to add it to your post.
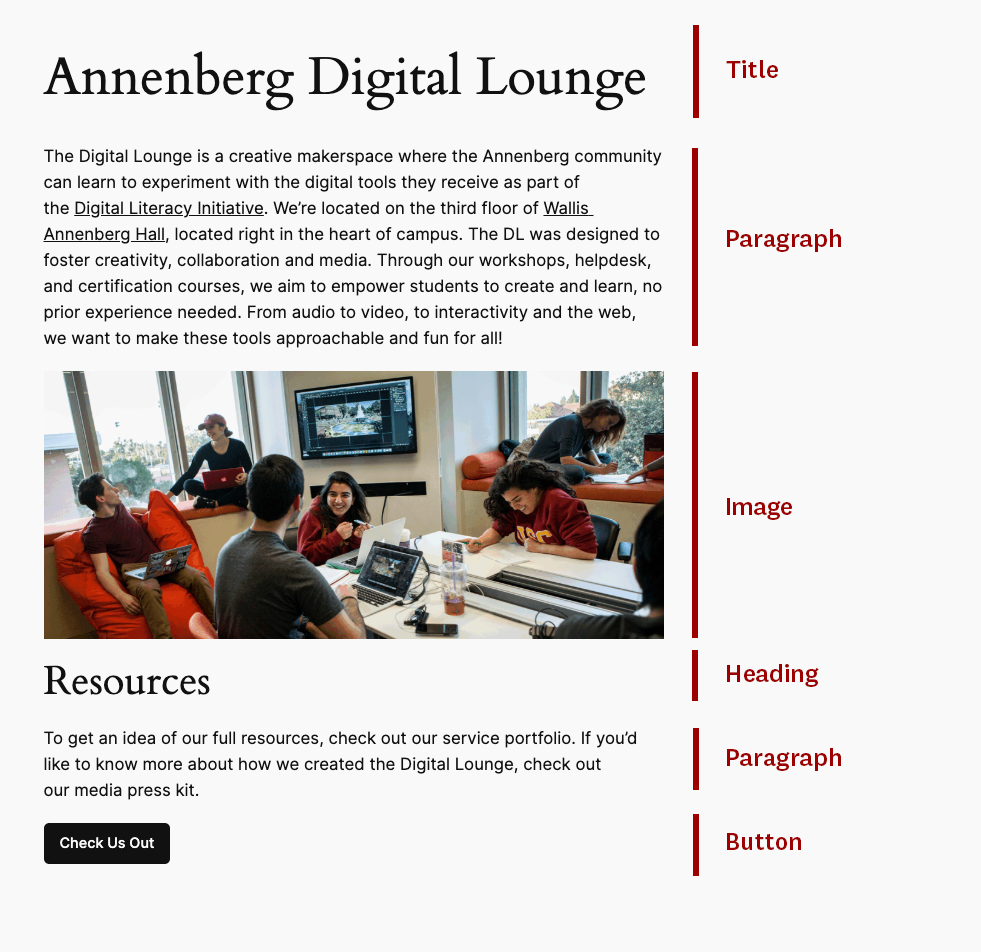
In our sample post below, we added two paragraph blocks, an image block, a heading block, and a buttons block.
Customize Content in a WordPress Post
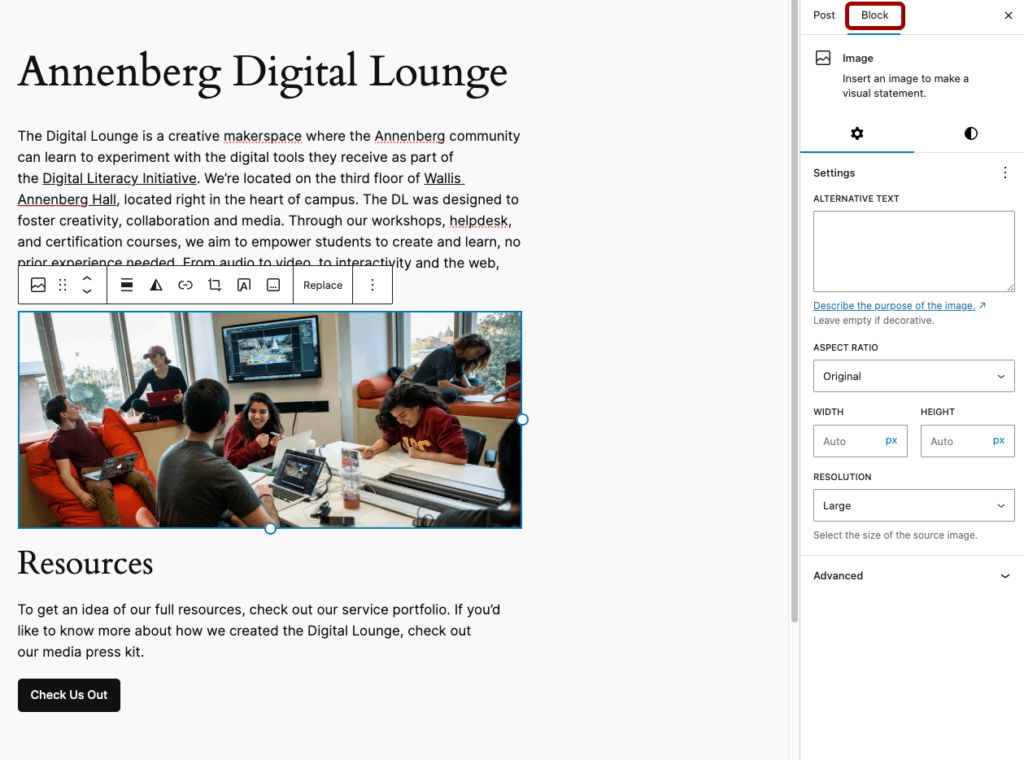
When you select a block in the editor, two options appear for customizing the block.
First, an inline toolbar appears near the block itself with options relevant to the block type. For example, image blocks will have alignment, filter, link, crop, cover text, and caption options appear in the inline toolbar.
Second, the Block settings panel on the right-side of the editor has additional customization options. The wheel icon tab has block-specific settings, while the half-filled circle icon tab has block-specific styles.
Configure Post Settings
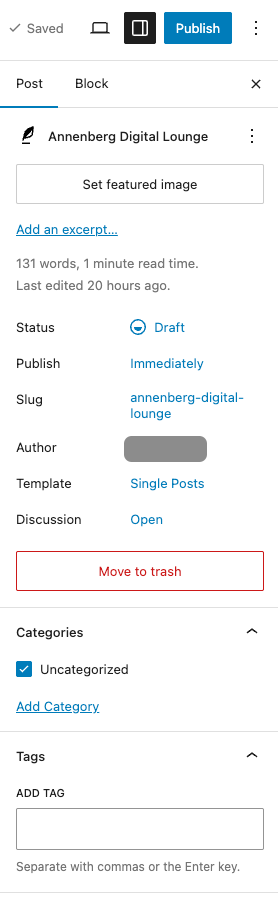
In the Post tab of the Settings pane, you can configure various settings for your post.
Click the Set featured image button to add a thumbnail image for your post. Depending on your theme and setup, this image will display at the top of your post and in a post index page.
Click the Add an excerpt link to open a text editor. In this text editor, write the description you want to appear for this post in a post index page.
You can also configure:
- Status: the current status of the post (draft, pending review, and so on)
- Publish: specify whether to publish the post immediately or schedule a date and time
- Slug: configure the slug for the post
- Author: change who’s listed as the author of the post
- Template: change the style template applied to the post
- Discussion: specify whether users can comment on the post
In the Categories section, you can add or manage the categories applied to the post. As a reminder, categories are a way to group related posts together, typically by common topic.
In the Tags section, you can add or manage the tags applied to the post. While categories group related posts together, tags help search engines understand what the post is about.
To save your work for later, click the Save draft button in the top-right.
Publish Your Content
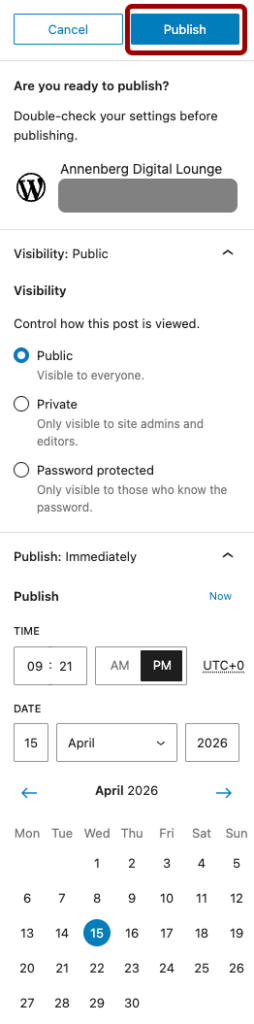
When you’re ready to publish your post, click the Publish button in the top-right.
The Visibility setting configures who can view your post. You can set it to:
- Public: anyone can see your post
- Private: only site admins and site editors can see your post
- Password protected: only those with the specified password can see the post
The Publish setting configures when the post is published. You can set it to Immediately to publish the post right now or schedule a data and time for when the post should be published.
Customize Your Website Design
Themes are the core of website design in WordPress. They are style packs that determine how your content is displayed to someone who visits your site. Depending on the service you’re using for your WordPress site, you may have access to several themes or a select few.
Change Your Theme
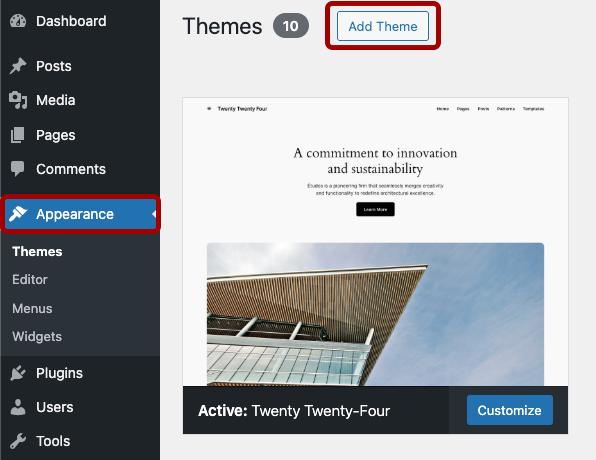
To change the active theme used on your WordPress site:
- Click Appearance in the left menu.
- Click Add Theme.
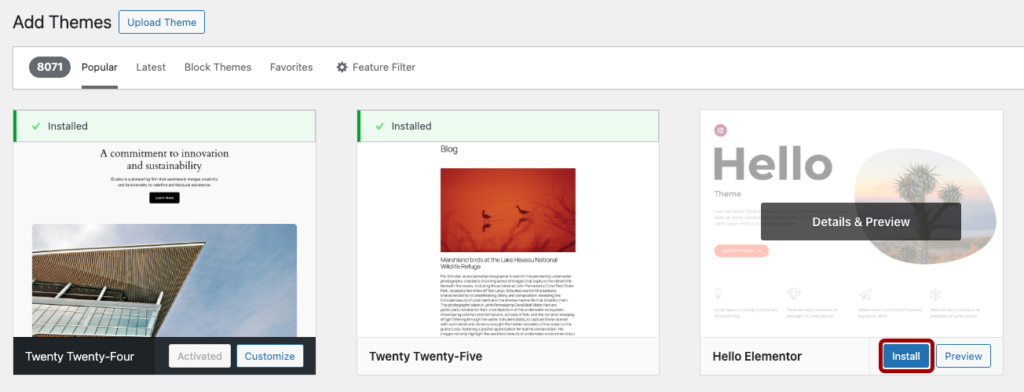
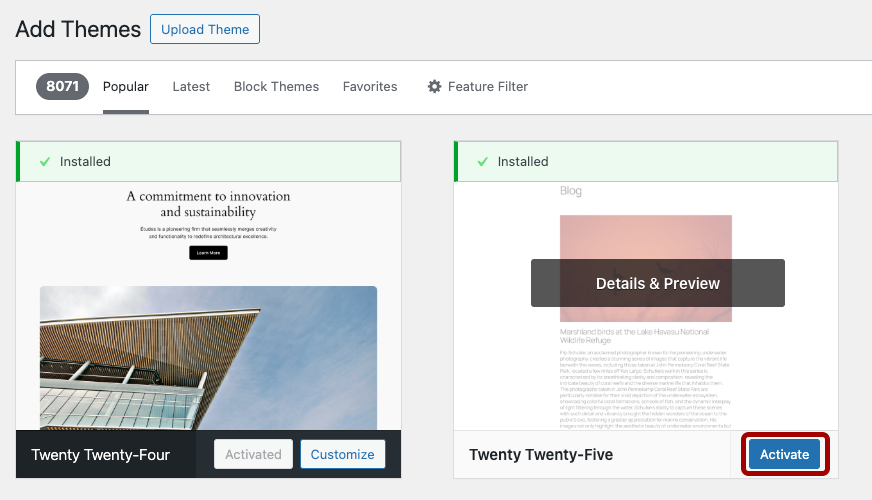
- On the Add Themes screen, hover over the theme and click Install.
- Once you’ve installed a theme, hover over it and click Activate.
Customize Your Theme
To customize your theme, click Editor under the Appearance section of the left menu. If you’re using an older theme, you will see Customize instead of Editor.
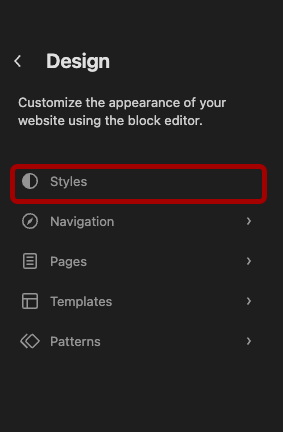
In the Design tab of the Editor, click the Styles button.
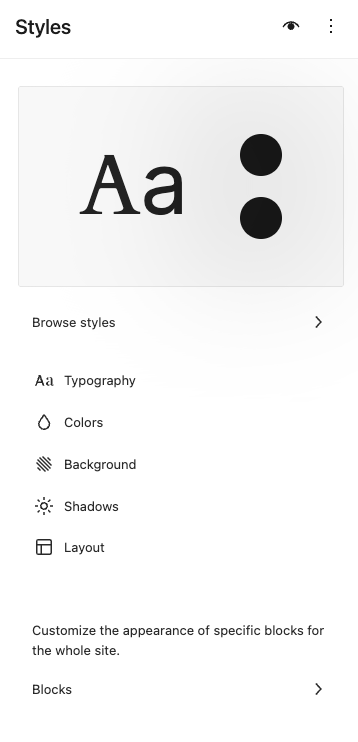
In the Styles tab that opens, you have three main ways to customize your theme:
- Browse Styles: Change between variations of your core theme styles.
- Style Categories: Change specifics about the typography, colors, background, shadows, and/or layout of your site.
- Blocks: Select a specific content block to set default styling for all instances of that content block across your site.
Whenever you’ve made changes to your theme, make sure to click the Review changes button and save your changes.

Configure Settings
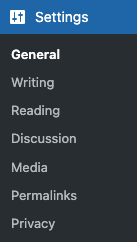
WordPress has a robust Settings menu that helps you configure your site to meet your needs. Options include:
- General: update your site title, site icon, site language, timezone, and date format
- Writing: define a default post category and post format
- Reading: select which page is your homepage, how many posts show in a post index page, and whether search engines should index your site
- Discussion: configure whether visitors can submit comment on your site
- Media: specify the size of image size presets
- Permalinks: change the slug of your posts
- Privacy: create and manage a Privacy Policy page
Using WordPress for an Annenberg class assignment? Check out our specific tutorials for the JOUR 414 and PR 524/525 and PRSM 520/525 courses!