Using the Illustrator Pen Tool
There are many things you can do in Illustrator, but two of the most vital are the Pen Tool and the Pathfinder tool. This tutorial will show you all of the different uses of the pen tool, as well as some tips and tricks to make using it easier.
How to Access the Pen Tool
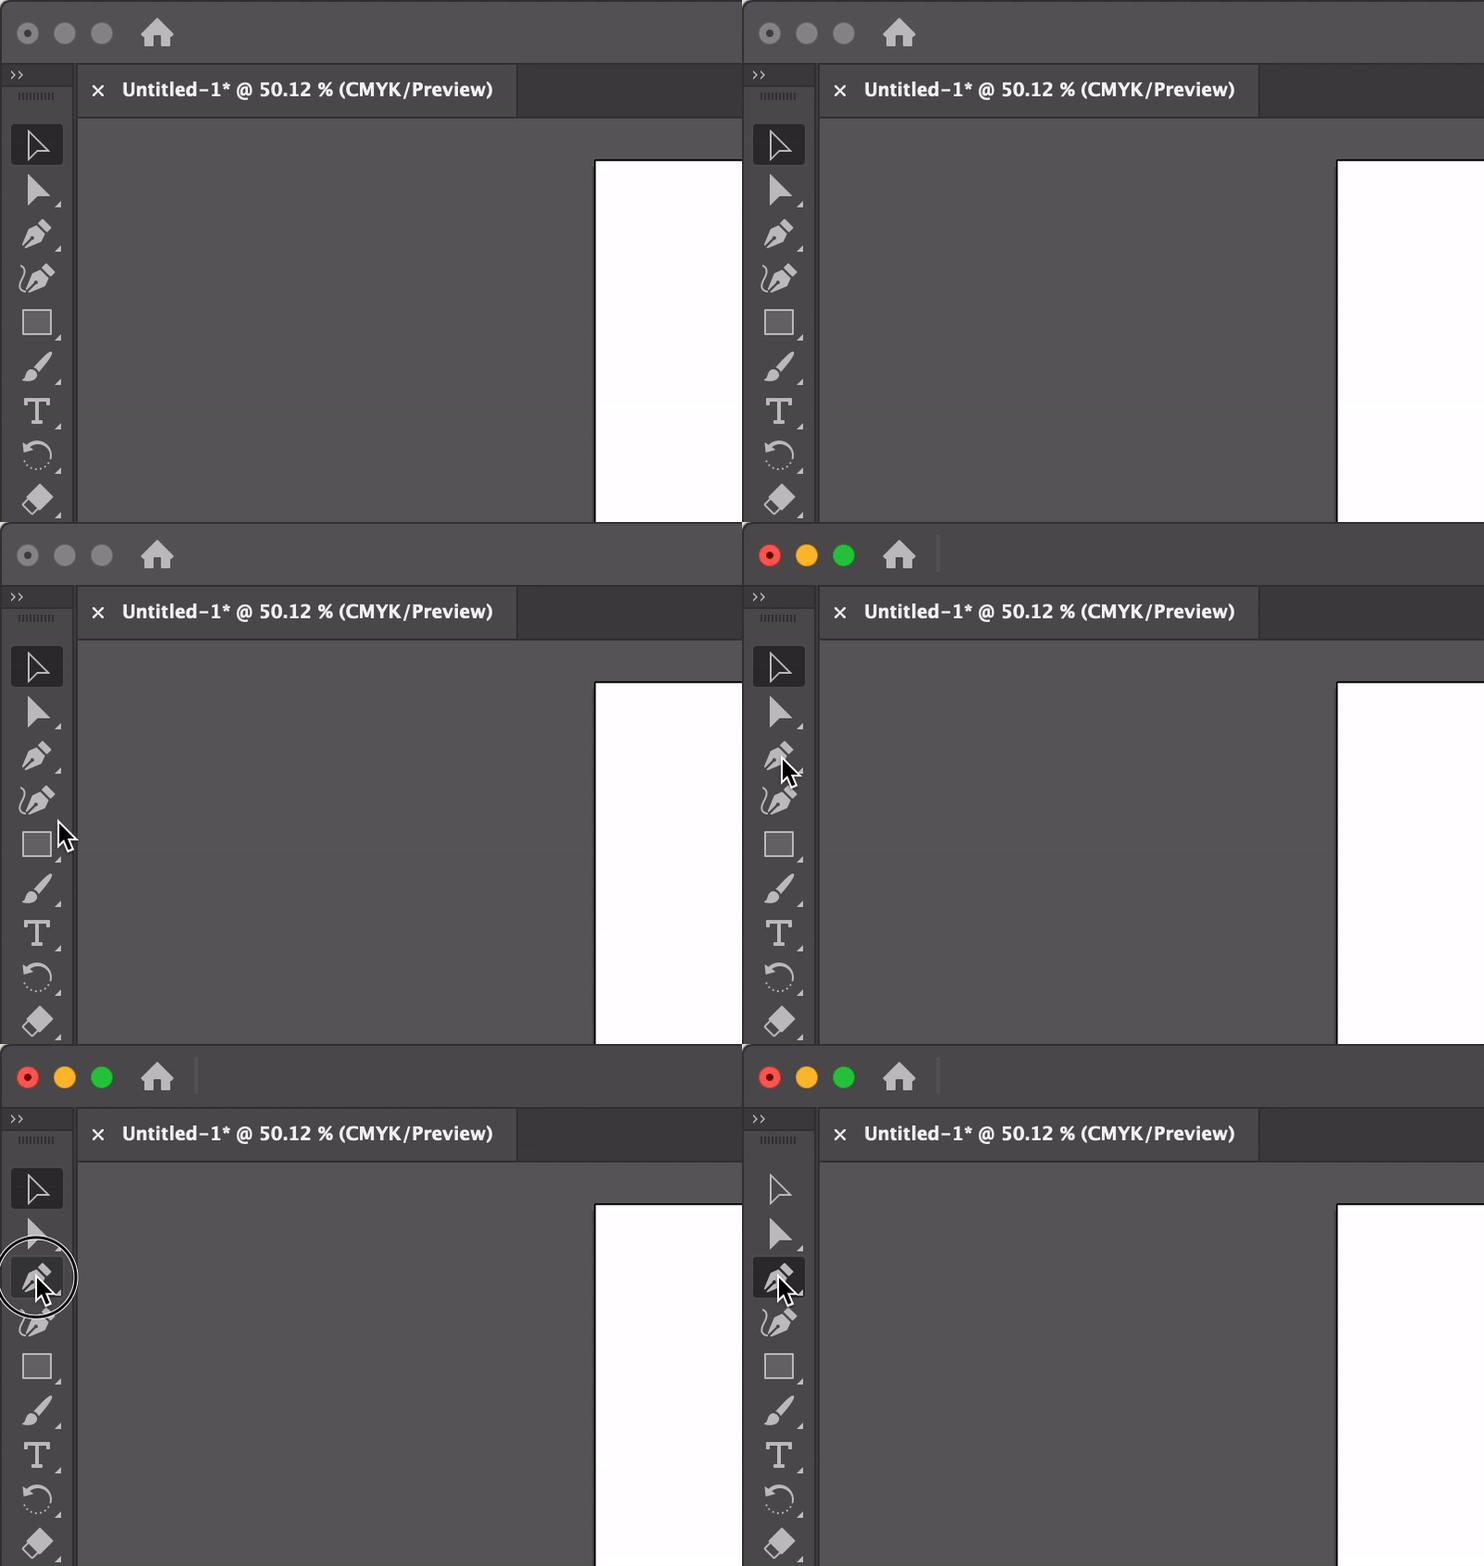
The pen tool is at the top of the toolbar on the left-hand side of the application.
Draw Straight Line Segments with the Pen Tool
The simplest path you can draw with the Pen tool is a straight line, which can be created from two anchor points on your artboard. By clicking, you can create anchor points, which the tool will the connect to form a line. If you click multiple times, creating multiple anchor points, the tool will create a path made of straight line segments connected by corner points.

- Select the Pen tool (
 ).
). - Position the Pen tool where you want the straight segment to begin, and click to define the first anchor point (do not drag).
- If direction lines appear, you’ve accidentally dragged the Pen tool; choose Edit > Undo, and click again.
- Click again where you want the segment to end (Shift-click to constrain the angle of the segment to a multiple of 45°).
- Continue clicking to set anchor points for additional straight segments. The last anchor point you add always appears as a solid square, indicating that it is selected. Previously defined anchor points become hollow, and deselected, as you add more anchor points.
- Complete the path by doing one of the following:
- To close the path, position the Pen tool over the first (hollow) anchor point. A small circle appears next to the Pen tool pointer
 when it is positioned correctly. Click or drag to close the path.
 - To leave the path open, Ctrl-click (Windows) or Command-click (macOS) anywhere away from all objects.
- To leave the path open, you can also press Esc, select a different tool, or choose Select > Deselect. You can also simply press Enter or Return to leave the path open.
- To close the path, position the Pen tool over the first (hollow) anchor point. A small circle appears next to the Pen tool pointer
Draw Curves with the Pen Tool
You can create a curve by adding an anchor point where a curve changes direction, and dragging the direction tangent lines that shape the curve. The length and slope of the tangent direction lines determine the shape of the curve.
Curves are easier to edit and your system can display and print them faster if you draw them using as few anchor points as possible. Using too many points can also introduce unwanted bumps in a curve. Instead, draw widely spaced anchor points, and practice shaping curves by adjusting the length and angles of the direction lines.

- Select the Pen tool.
- Position it where you want the curve to begin, and hold down the mouse button (in the example, a circle appears around the mouse when it is being held down). The first anchor point appears, and the Pen tool pointer changes to an arrowhead.
- Drag to set the slope of the curve segment you’re creating, and then release the mouse button. In general, extend the direction line about one third of the distance to the next anchor point you plan to draw. (You can adjust one or both sides of the direction line later.)
- Hold down the Shift key to constrain the tool to multiples of 45°.
- Position the Pen tool where you want the curve segment to end, and do one of the following:
- To create a C‑shaped curve, drag in a direction opposite to the previous direction line. Then release the mouse button.

- To create an S‑shaped curve, drag in the same direction as the previous direction line. Then release the mouse button.

- Note: Press Command/ Ctrl while dragging the handles of a smooth point, to make them inequal in length when you’re drawing a curve.
5. Continue dragging the Pen tool from different locations to create a series of smooth curves. Note that you are placing anchor points at the beginning and end of each curve, not at the tip of the curve.
6. Keep in mind that the direction line determines the slope of your curve, the longer the line, the wider the arch. You can also change the orientation of the direction line to bend the curve in the orientation you need. Press and hold Alt (Windows) or Option (macOS) and drag the direction line toward its opposing end to set the slope.
Draw Curves with the Curvature Tool
The curvature tool is a simpler way to draw curves, if you don’t want to use the pen tool.
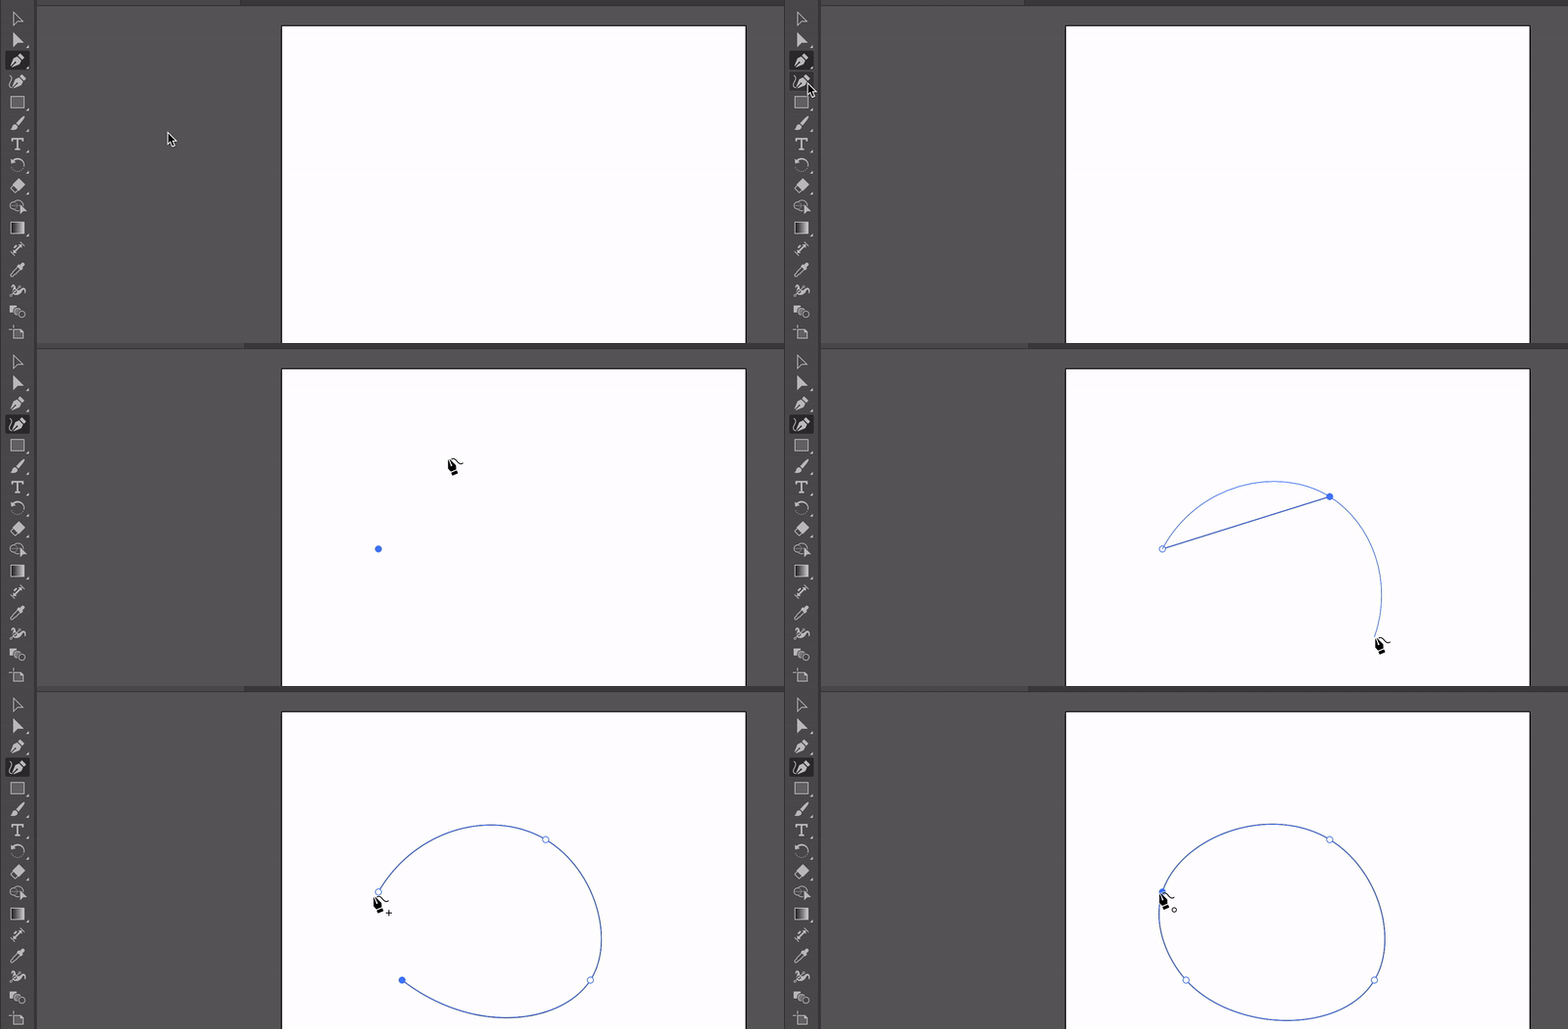
- Select the Curvature tool.
- Position the curvature tool where you want the curve to begin, and click the mouse button. The first anchor point appears.
- Move and click the mouse to set the slope of the curve segment you’re creating.
- Hold down the Shift key to create smooth circular lines with the tool.
- Position the Pen tool where you want the curve segment to end, and do one of the following:
- To create a C‑shaped curve, drag in a direction opposite to the previous direction line. Then release the mouse button.
The pen tool is one of the most integral tools in getting started with Illustrator, and using it will help start building your knowledge in the program!
Want to learn more on how to get started with Illustrator? Take a look at our Illustrator Tutorials.


