Edit a Podcast with Adobe Audition
Grab your recording and fire up your computer – we’re going to edit a podcast with Adobe Audition!
Import Audio Files
If you are following along from the previous tutorial, Record a Podcast with Adobe Audition, you should already have audio files in your Audition workspace. If you don’t have any audio in your workspace, you can import files into Audition using FILE > IMPORT > FILE or the shortcut Command-i (Mac) or Control-i (Windows).
For this tutorial, we’ll be using 3 audio files: 2 speakers (host, guest) and 1 music file (theme song).
Sync Files & Navigate the Editor
With your audio files in the project, let’s click & drag them to their own tracks. We’ll put HOST on TRACK 1, and GUEST on TRACK 2:
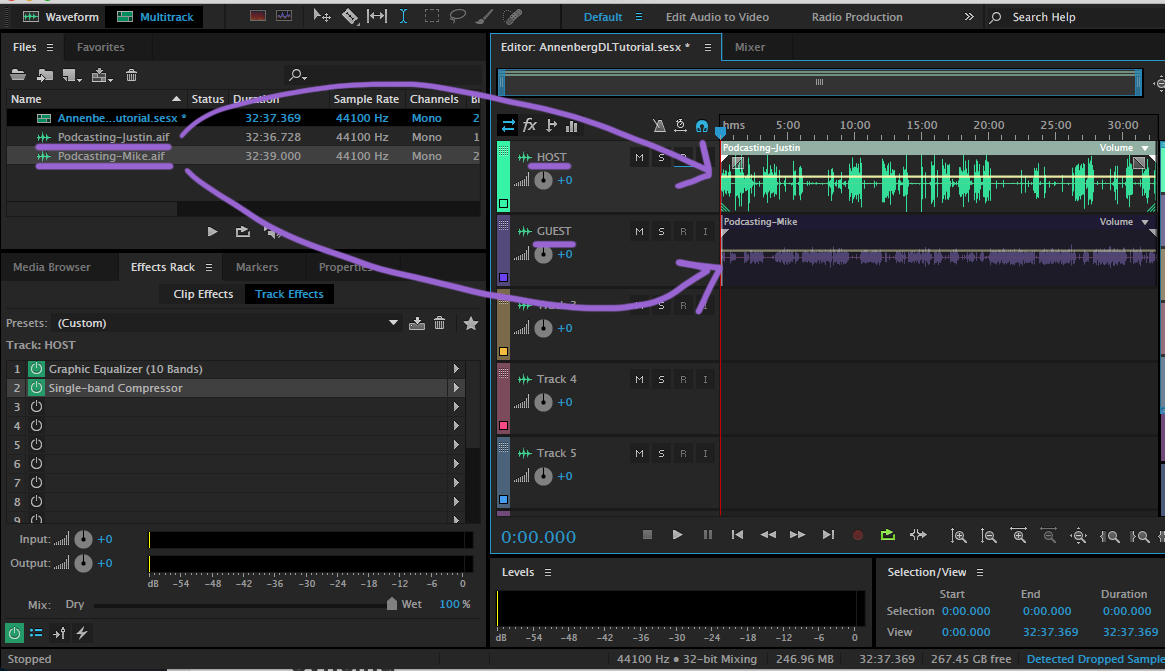
If you press PLAY (SPACEBAR) they’ll start talking over each other within a few seconds because the timing is off. We need to get these tracks in sync!
ZOOM IN to the front of the tracks to see the waveforms better. There are ZOOM IN/OUT buttons along the bottom of the EDITOR tab, but an easier way is to hit the + (plus) key to ZOOM IN and the – (minus) key to ZOOM OUT (these shortcuts are located to the right of the numbers row at the top of your keyboard).
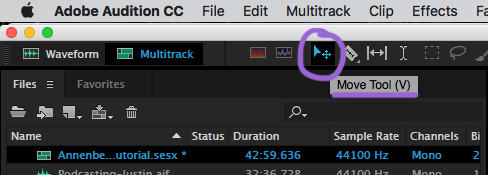
Once we zoom in, we can listen to the first 20 seconds or so and deduce that the host is early and the guest is late with his responses. This means we’ll drag Host to the right until they get lined up better. We can do this with the MOVE tool – click it from the TOOLBAR up top or use the shortcut V:
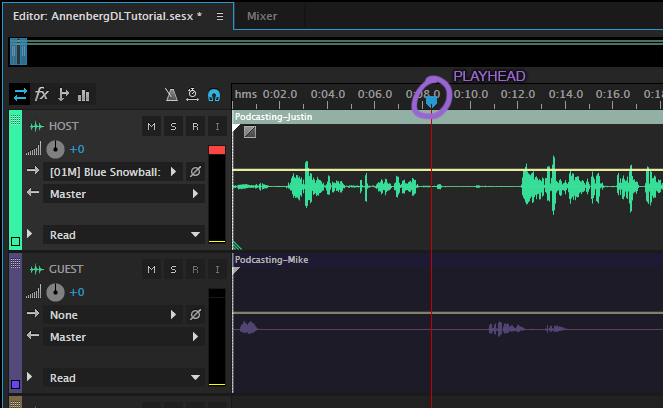
With the MOVE tool, we drag Host to the right and play it back again, repeating as necessary once Guest answers him at the right time. You can repeat a section of audio that you just heard by clicking & dragging the PLAYHEAD back to the front of the tracks.
Syncing audio is a bit of trial and error until you find the right timing, but don’t worry, you’ll get there.
Edit Your Podcast
Up next, let’s start to actually edit a podcast. First, we’ll want to do some chopping. For our example, we want to chop out the front chatter before the show officially starts and at the end. There is also one slip-up towards the end of the show that we want to chop out too. How do we do that?
Use the TIME SELECTION tool. Click it in the TOOLBAR up top or use the keyboard shortcut T.

Use this tool to select a region you want to chop out. Then hit DELETE. It’s that easy.
Host starts the show around 15 seconds in when he says “Hello!” We select the track before this and chop it out. We do the same with Guest – chop out everything until he starts talking. It should go like this:
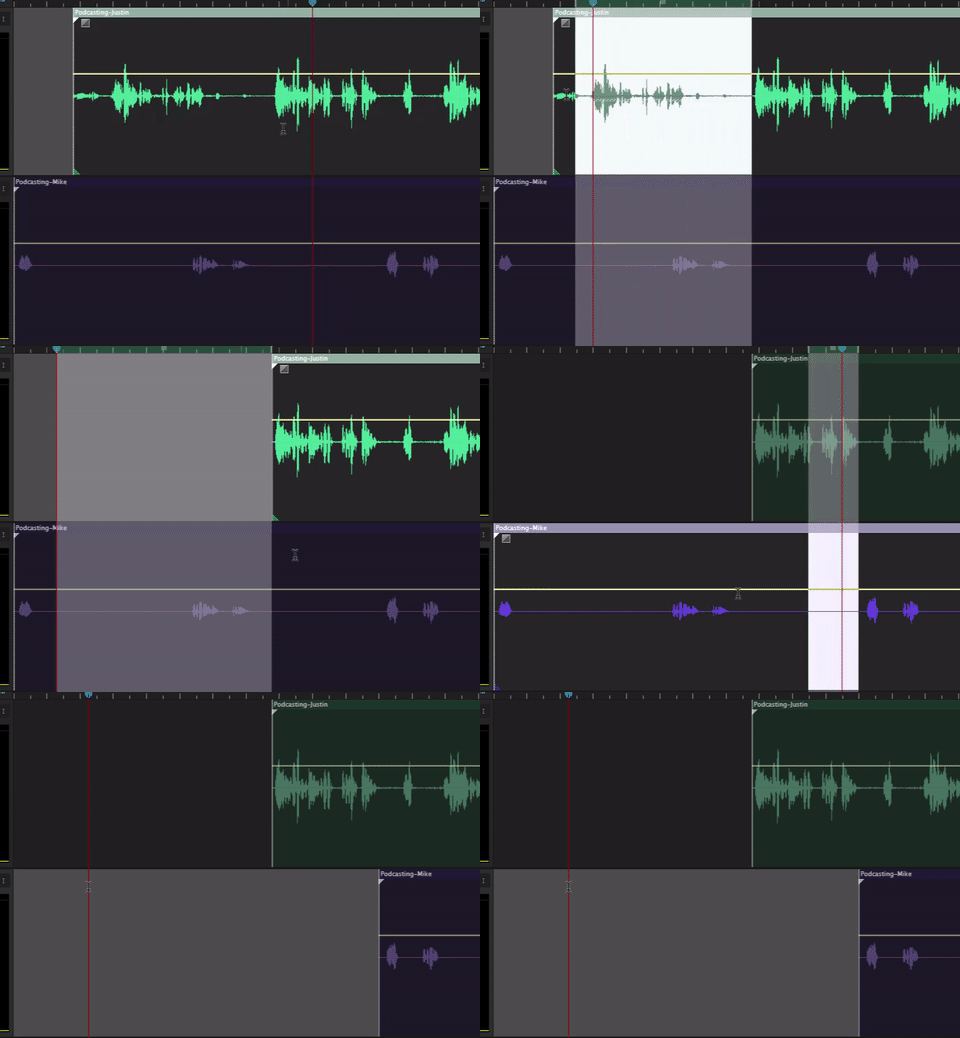
We repeat this for the end of the show. A nice shortcut to jump to the end is to use the END key if your keyboard has one. You can also use the FUNCTION key (bottom left FN key) with the RIGHT ARROW key to do the same. Alternately, HOME and/or FN+LEFT ARROW will jump to the front of the project.
The Ripple Delete
If you chop out anything in the middle of your show, you’ll need to do a different kind of delete – in Audition it’s called a RIPPLE DELETE. This will remove the selection and slide everything after it over so there is no gap.
Use the TIME SELECTION tool to select the region you want to delete. Use the waveforms as your guide, and ZOOM IN if you need to!
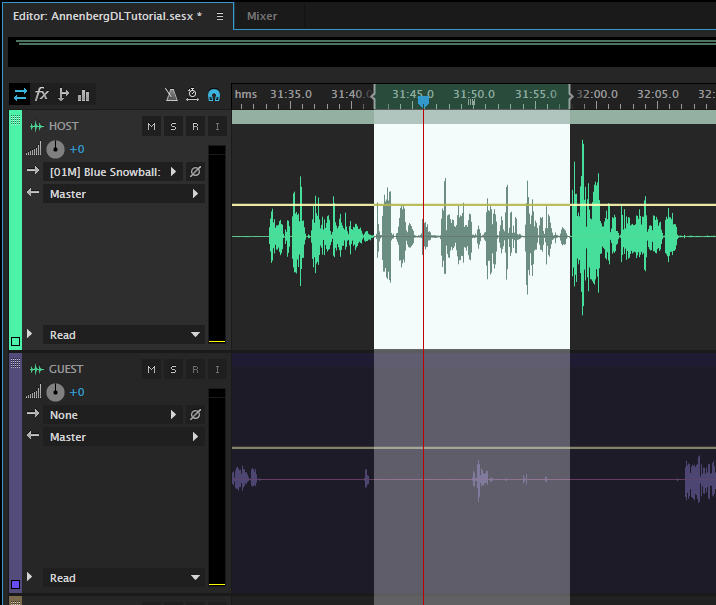
Now let’s RIPPLE DELETE! Use EDIT > RIPPLE DELETE > TIME SELECTION IN ALL TRACKS to make this happen.
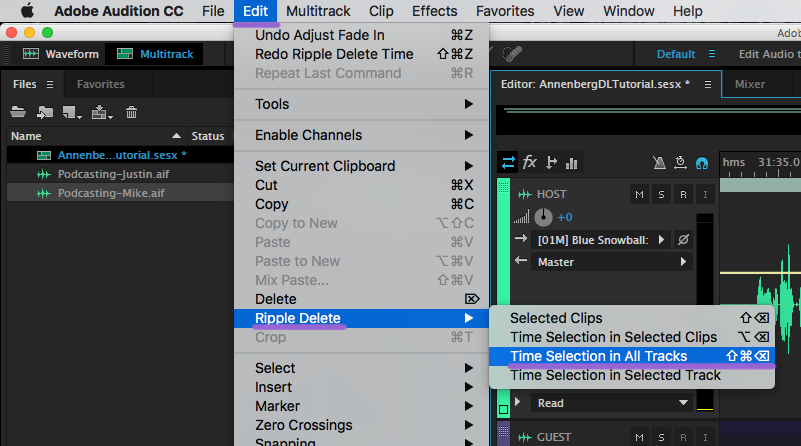
Make sure you use the ALL TRACKS options, otherwise you’ll only delete one track’s area and pull it out of sync.
Adding Music & Adjusting Audio Levels
Now let’s slide the intro song in there to TRACK 3. You’ll see it’s super loud compared to the voices! Let’s go ahead and turn it down using the track’s tools. You’ll find the VOLUME knob just under the TRACK NAME:
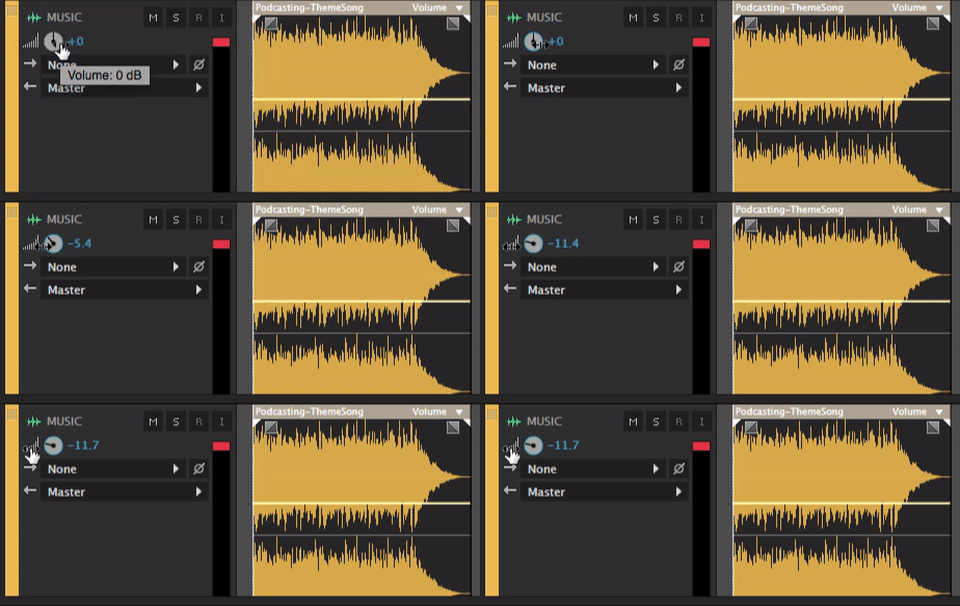
Next thing – the song ends too early. Host doesn’t start speaking soon enough after it fades out. Let’s go ahead and MOVE our music to the right until it’s happily half-faded out as Host starts the show:
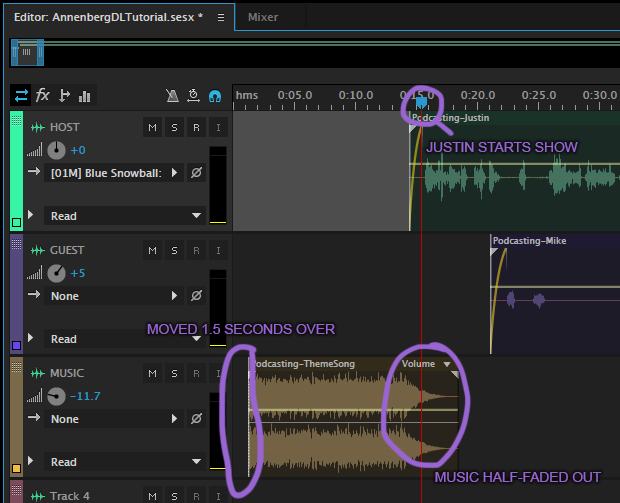
Now let’s RIPPLE DELETE this new gap we just created up front. Remember how? SELECT that region, then RIPPLE DELETE ALL TRACKS. You’re getting the hang of this!
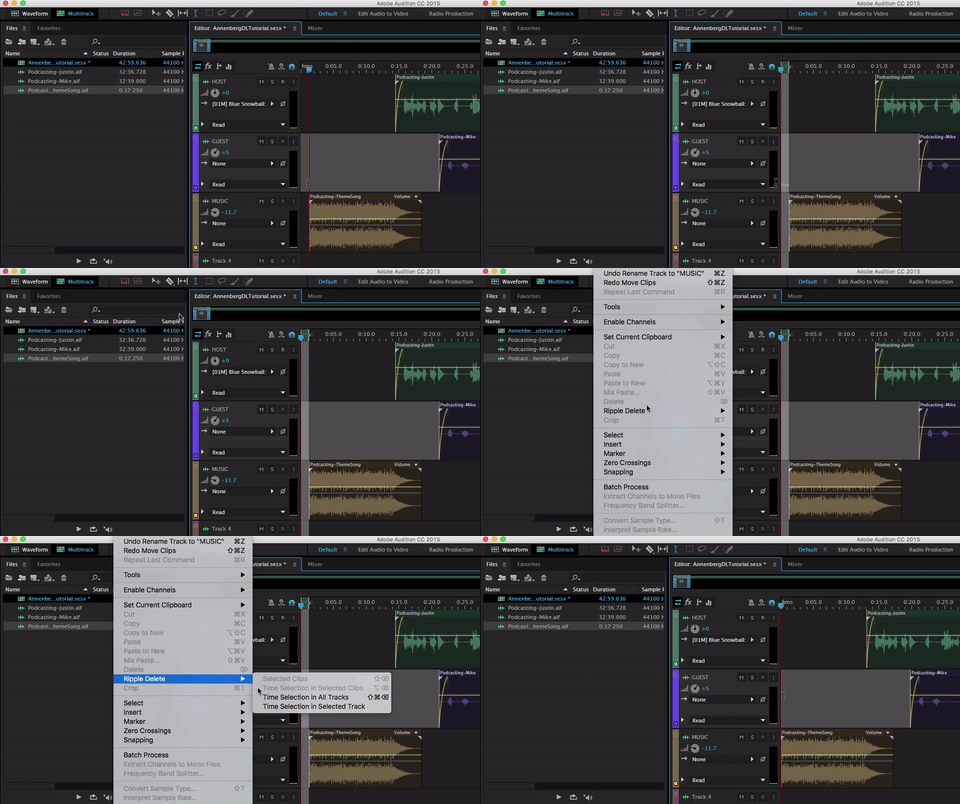
TWO MORE THINGS:
1 – Adding the theme song to the end of the show. FN-RIGHT ARROW to the end and drag the song from the FILES tab onto Track 3 at the end. We place it where Host wraps it up “Podcasting with the Digital Lounge.”
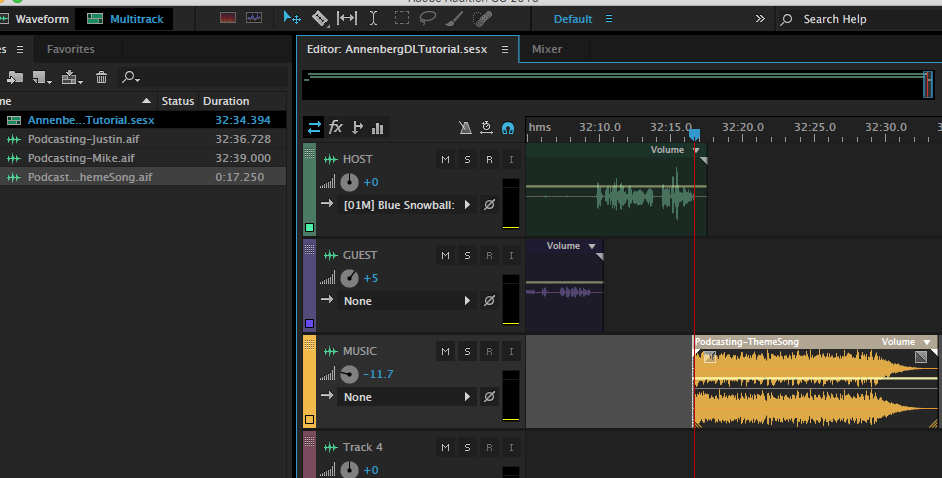
We don’t need to adjust the volume again, since the adjustment we made already changes it for every file that lives on that track.
2 – Speaking of adjusting volume levels, we noticed a discrepancy between HOST and GUEST’s tracks – Host is much louder than Guest so we gave Guest’s track a boost of 6dB.
Exporting Your Podcast As an MP3
Let’s get the show out of Audition and into MP3 land! To export your session use the menu and go to FILE > EXPORT > MULTITRACK MIXDOWN > ENTIRE SESSION:
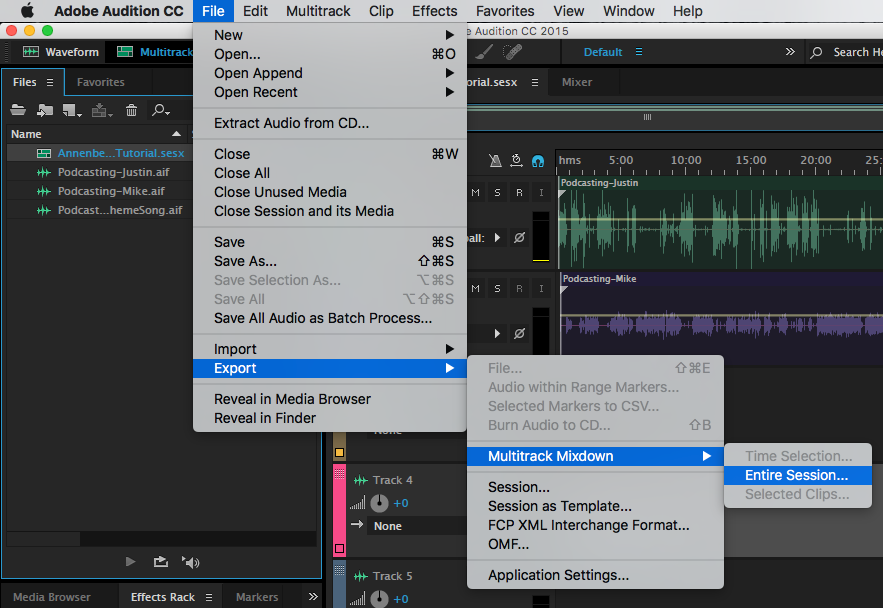
This will open the mixdown options window:
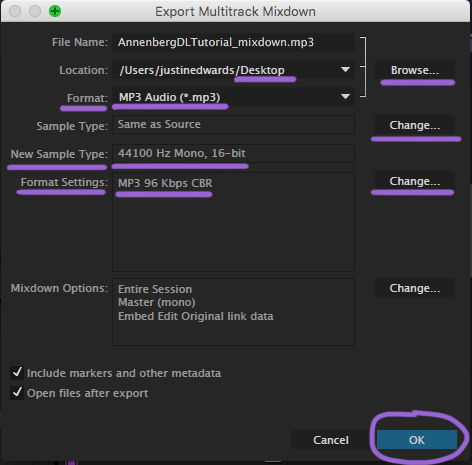
We’ll want to make some changes to the defaults.
- Choose where you want to export the file. Use BROWSE to do this.
- Change the FORMAT. Use the dropdown box to choose MP3.
- CHANGE the SAMPLE TYPE. This will open the convert sample type window:
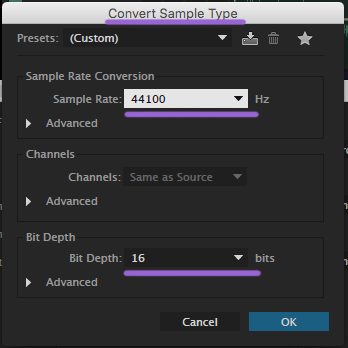
- Change the SAMPLE RATE from “Same as source” to 441000.
- Change the BIT DEPTH from “Same as source” to 16. Hit OK.
- Lastly, CHANGE the FORMAT SETTINGS. It will open MP3 settings window:
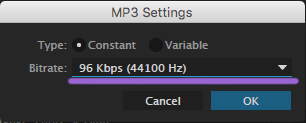
- Change the BITRATE to 96Kbps. This is because we just have a one-channel MONO file. A stereo show would double this since it has two channels. Hit OK.
- Hit OK in the export window and Audition will do its thing!
Go find your file where you saved it. Congratulations, you can edit a podcast now!
To continue refining your podcasting editing skills, go to our EQ, Compressor, and Limiter Effects in Adobe Audition tutorial to learn about different audio effects you can use in Audition!


