Create a Mandala with Adobe Illustrator
This tutorial will cover how to easily create a mandala pattern using Adobe Illustrator.
Create a New Document
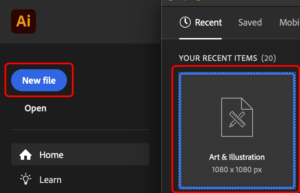
Open Adobe Illustrator and click New file. Select the document size for your mandala (we’re using the Art & Illustration preset).
Create an Outline Shape
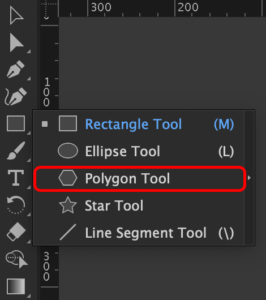
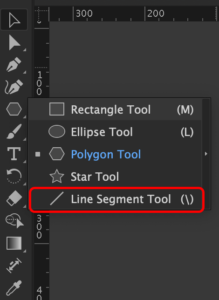
To ensure the mandala is symmetrical, select the Polygon tool and click in the canvas. The Polygon tool is within the shape tools group. To access the Polygon tool, right-click on the Rectangle tool.
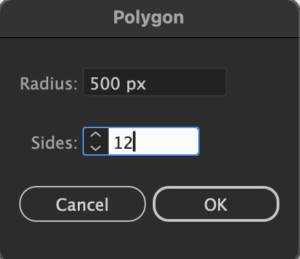
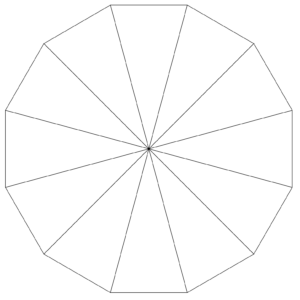
In the Polygon Settings menu, select a 500px radius and 12 sides, then click OK. If you’re using a different document size than the Art & Illustration preset, you may have to change the radius size to fit your canvas. If you want more details in your mandala, increase the number of sides.
Select the Line Segment tool (it is also located in the shape tools group).
Click on one corner of the shape and drag to the corresponding point on the opposite side.
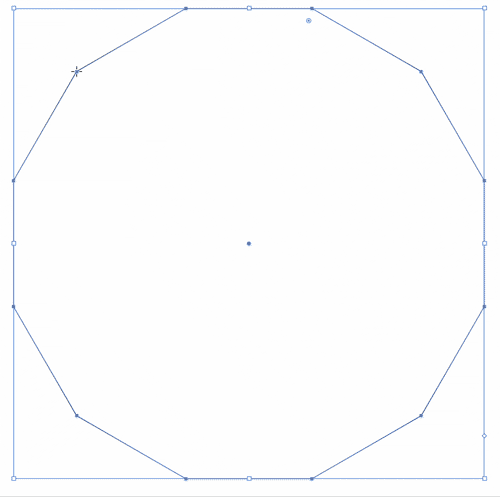
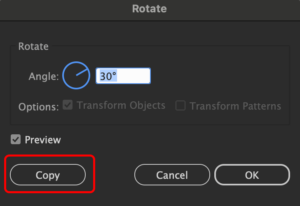
Select the line you just created and go to Object > Transform > Rotate.
Set the rotation angle to 30 and click Copy.
Use the keyboard shortcut Windows + D (Windows) or Command + D (Mac) to duplicate a rotated line until you have 12 triangles within the polygon.
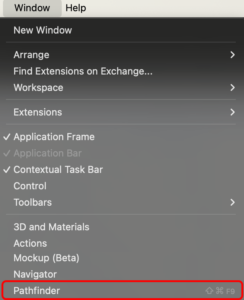
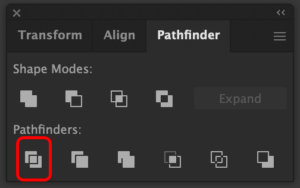
Go to Window > Pathfinder to open the Pathfinder panel.
Select the polygon shape and all the lines within and then click the Divide button in the Pathfinder panel.
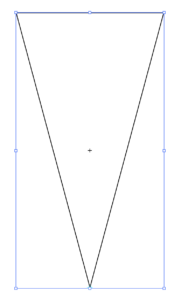
Now, each triangle in the polygon is its own shape and can be selected by double-clicking on it twice. Select all but one triangle and delete them. After you’ve done that, you should only have one triangle left.
Go to Window > Symbols to open the Symbols panel.
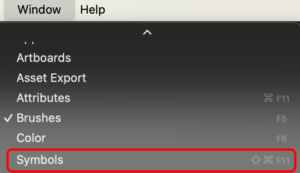
Select the triangle and click the New Symbol button.

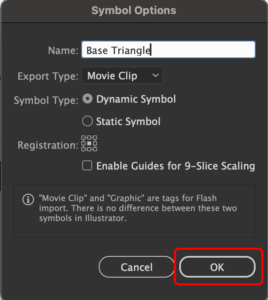
You can name the symbol and then click OK.
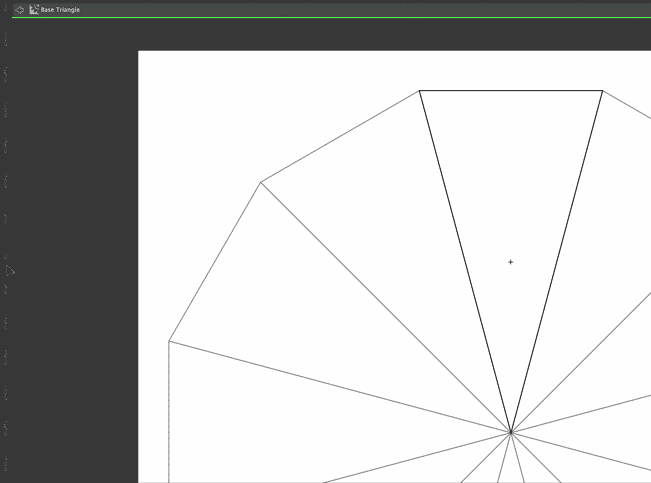
Click the Rotate tool.

With the Rotate tool selected, hold down Alt (Windows) or Opt (Mac) and then click on the point of triangle.
Set the rotation angle to 30 and click Copy.

Use the keyboard shortcut Windows + D (Windows) or Command + D (Mac) to duplicate the triangle. Repeat the keyboard shortcut until the polygon we had earlier is created. This time, because we copied a symbol, any changes we make to one triangle will apply to all other triangles.
Create a Mandala Design
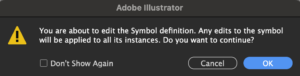
Double-click on one of the triangles. If you get a Symbol definition edit message, click OK.
Click in the vertical ruler and drag to center of the triangle to create a guide.
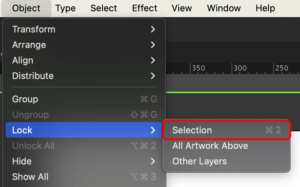
With the guide selected, go to Object > Lock > Selection to prevent making accidental changes to the guide.
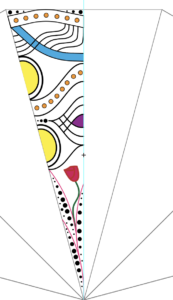
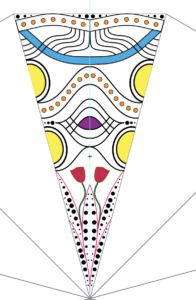
On one side of the guide, start designing your mandala! Use the Line, Arc, Shape, Paint Brush, or any other tool to create your own pattern. Draw any lines or designs inside the triangle to ensure it looks properly in the next section.
After you’re satisfied with your design, select all the lines and shapes you created. You can do this easily by opening the Layers panel. Hold down Windows (Windows) or Command (Mac) and click on the far-right location for each line and shape in the Layers panel.
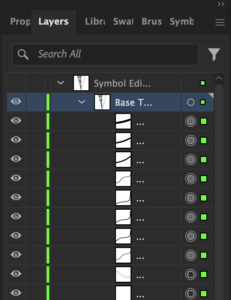
After you’ve selected each line and shape, use Windows + G (Windows) or Command + G (Mac) to group them all together.
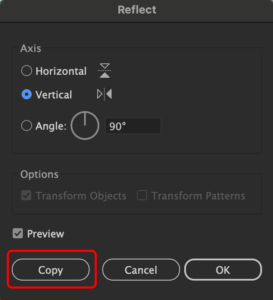
With the group selected, go to Object > Transform > Reflect.
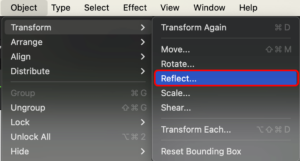
Set the axis to Vertical and the angle to 90. Click Copy.
Move the copied group to fill the same triangle as your design.
Click the back arrow icon in the top-left of the canvas to exit out of the symbol.
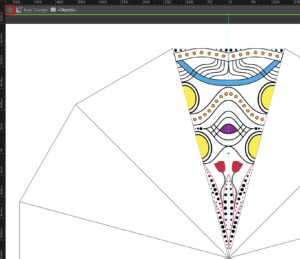
Your mandala design will now apply to each triangle within your polygon!