


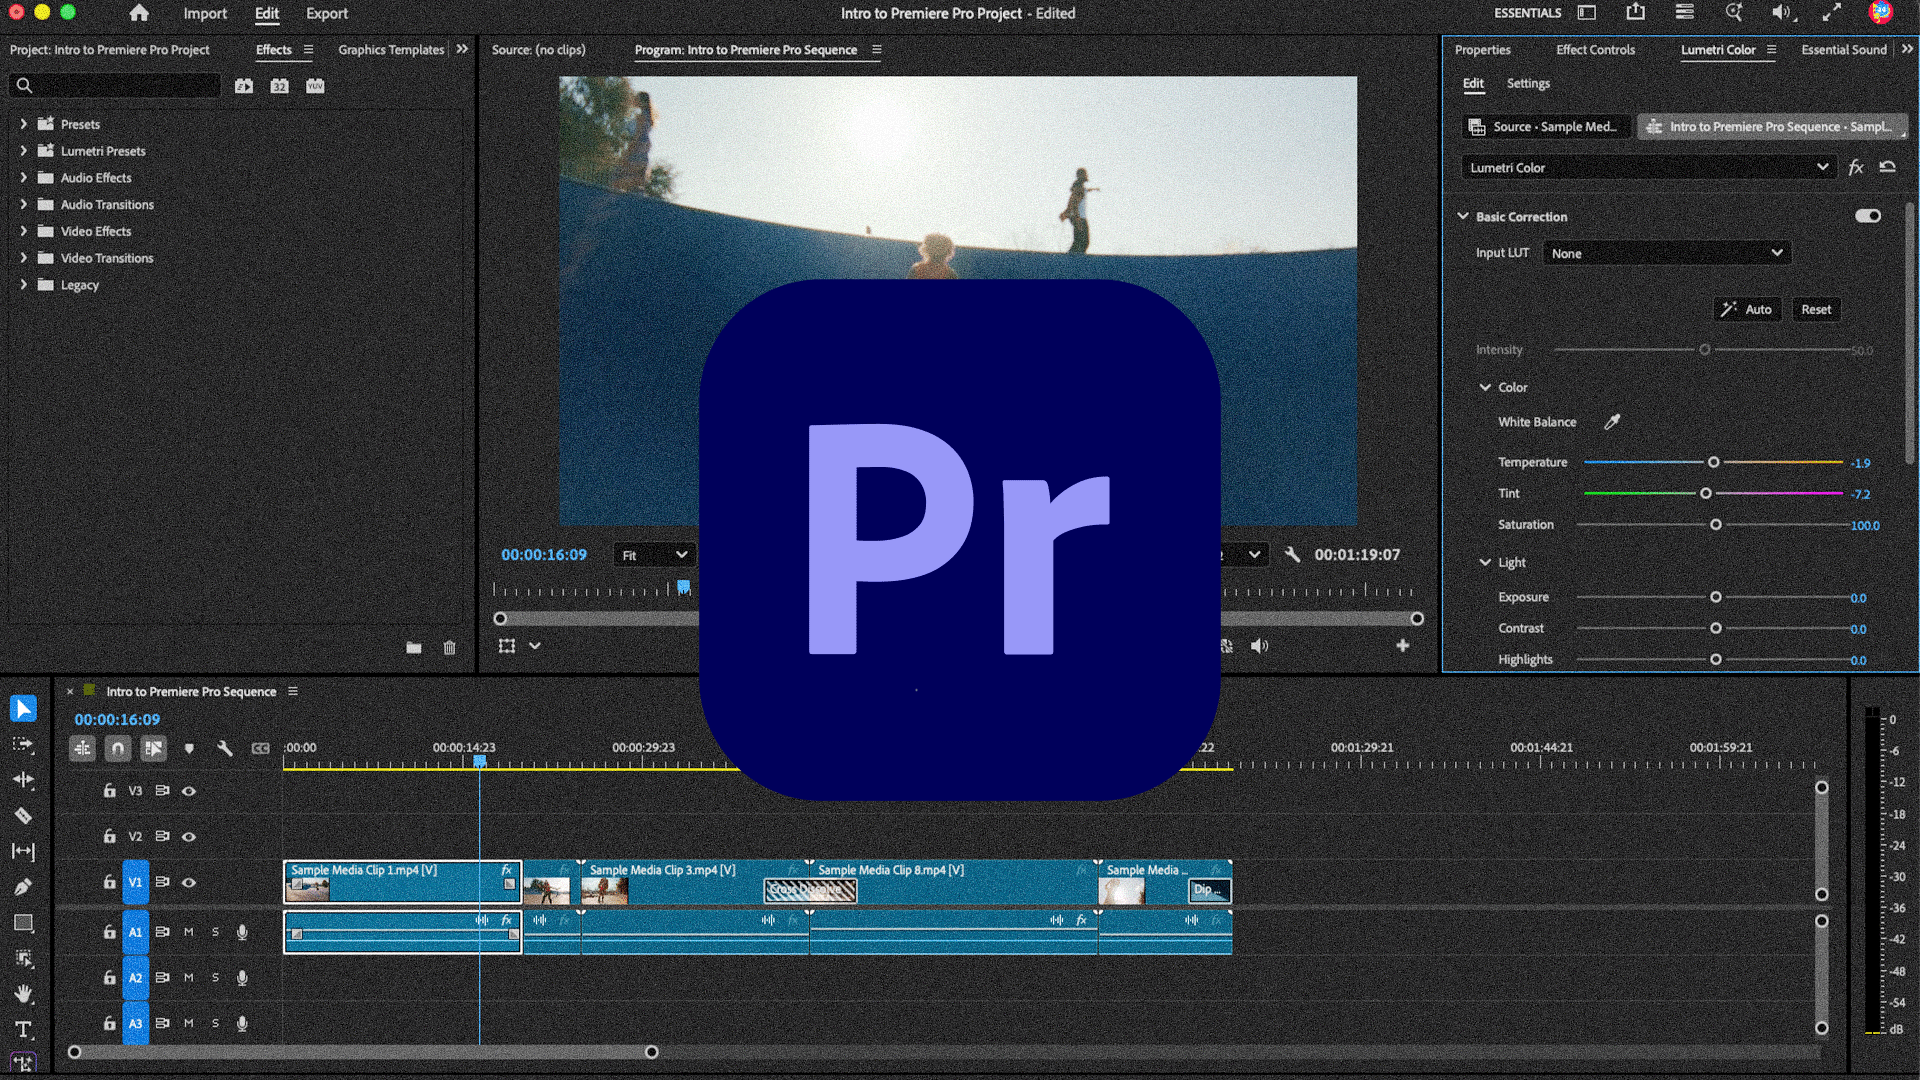
Intro to Premiere Pro
Adobe Premiere Pro is an industry-leading professional video editing and post-production application. In this Intro to Premiere Pro tutorial, you’ll learn the basics of Premiere Pro including how to:
- Create video projects
- Navigate the Premiere Pro interface
- Import and manage footage
- Perform simple video edits
- Save and export
All USC Annenberg students are offered free access to Adobe Creative Cloud, including Premiere Pro. Check out our Adobe Creative Cloud webpage for more information.
For this tutorial, we’ll use sample footage pre-loaded into Premiere Pro, but feel free to follow along with your own footage!
Create Video Projects
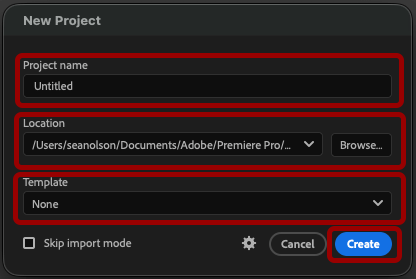
To create a new project in Premiere Pro, click the New Project button on the home screen. In the New Project popup:
- Enter a name for the project in the Project name field.
- Select where you want to save your file in the Location field.
- Select whether you want to start the project with a template.
- Click Create to create your project.
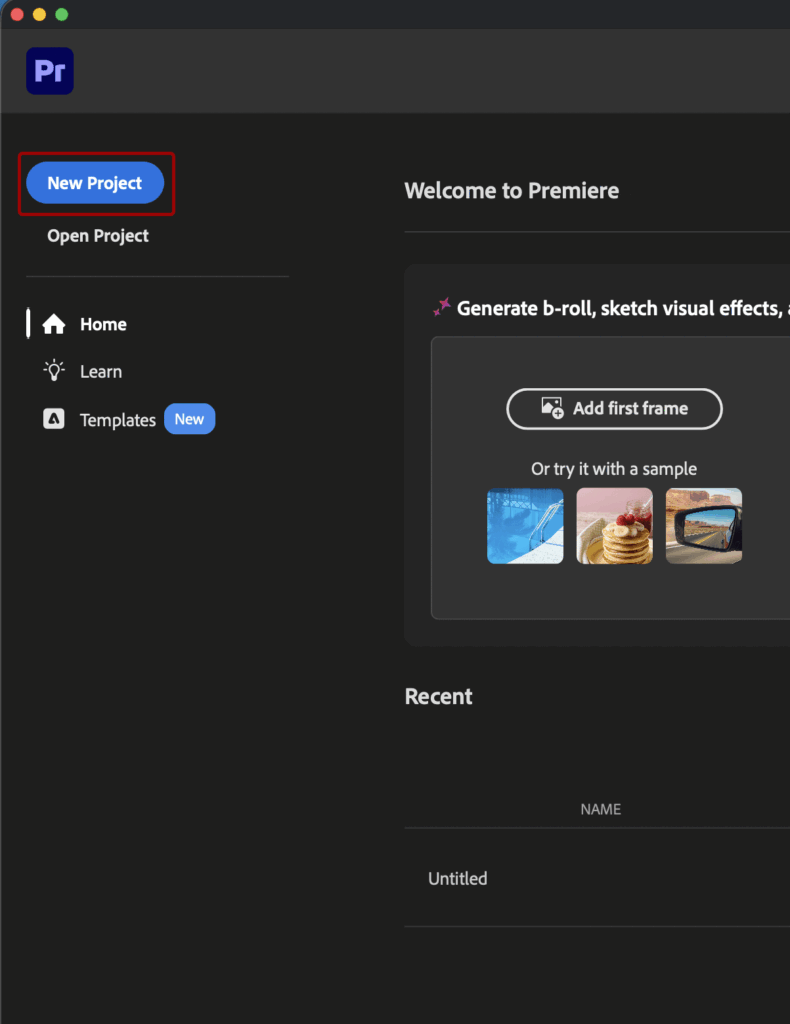
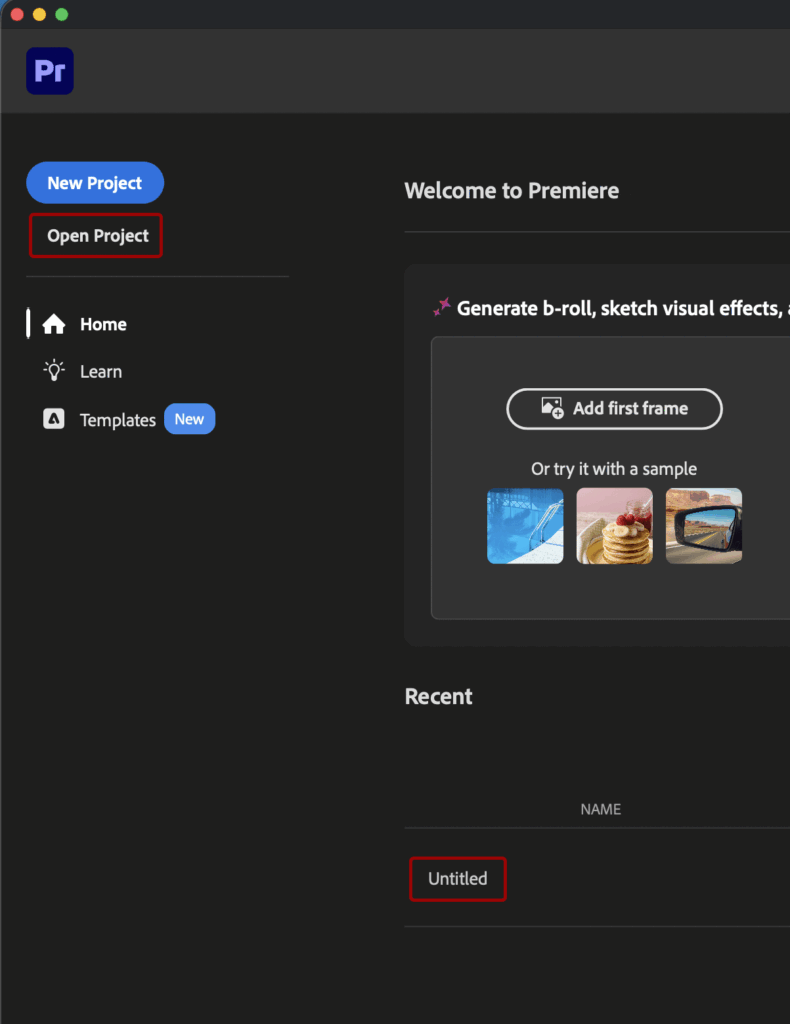
To open an existing project, either click the Open Project button or click on the project name in the Recent Project list.
Navigate the Premiere Pro Interface
In Premiere Pro, you can switch between different modes depending on what task you want to complete:
- Home mode is where you create and open projects
- Import mode is where you import footage and other assets into your project
- Edit mode is where you edit your project including video, audio, and graphics
- Export mode is where you configure the export settings for your project
On top of the Premiere Pro window, there’s a menu bar with various tools and settings.

Import and Manage Footage
In the Import mode, you select the footage and other assets you want to bring into your project. On the left side menu, you’ll see a file directory where you can locate files on your device. If you’re using an external hard drive, it will appear under the Devices section.
For this tutorial, we’ll use files found in the Sample Media folder.
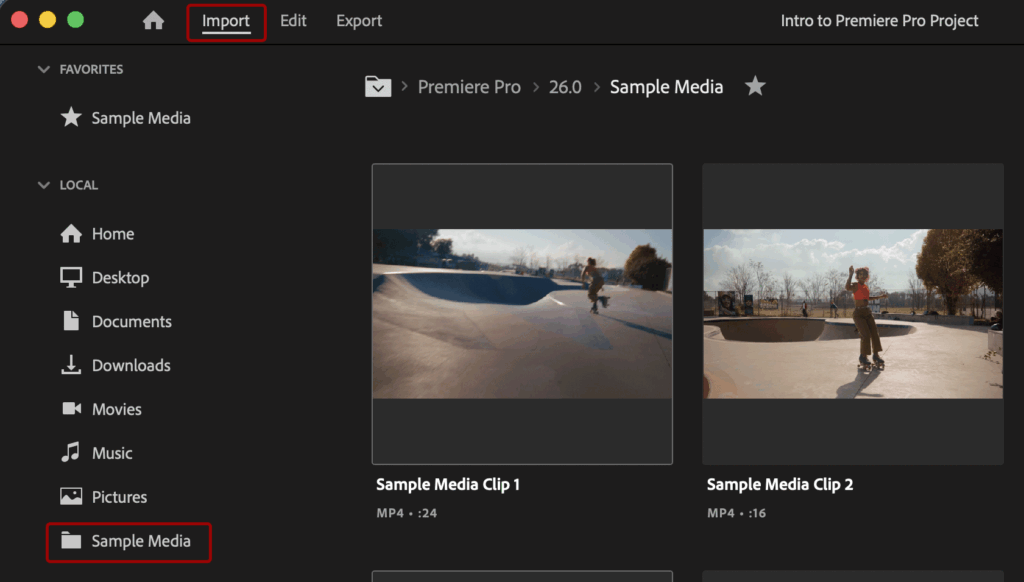
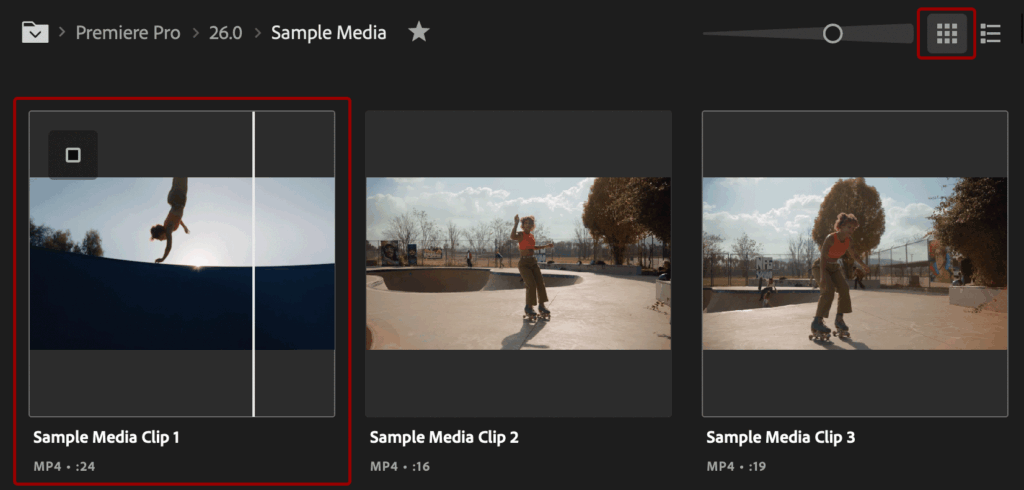
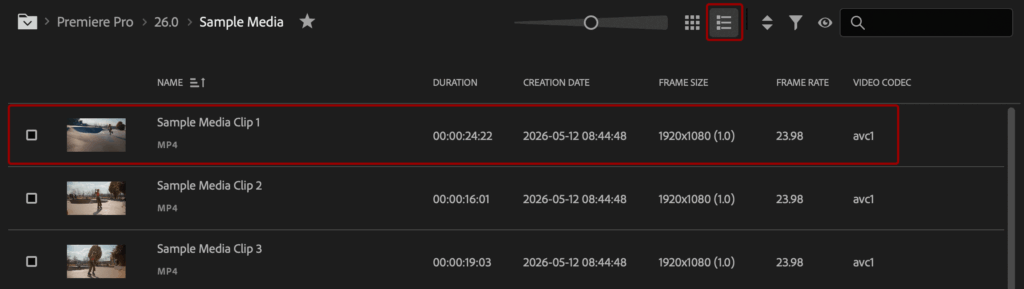
In the folder, you have two options for how you want to view the files:
- Thumbnail view shows a bigger image of the footage. Additionally, you can move your cursor from left to right over the thumbnail to see a preview of the video.
- List view shows a smaller, static image of the footage, but includes more metadata about the footage.
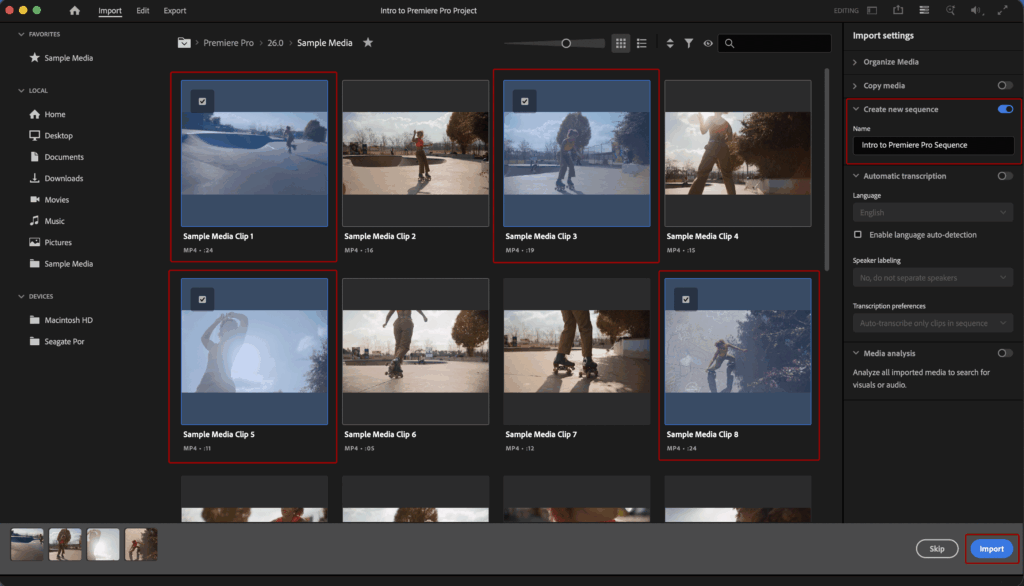
Check the checkbox by the video thumbnail to select the file. You can select one or more files at any time. For this tutorial, select sample media clips 1, 3, 5, and 8.
On the right side of the Import mode screen, you can configure settings for the import. For this tutorial, we’ll only toggle on the Create new sequence toggle and enter a name of Intro to Premiere Pro Sequence. A sequence is the primary workspace in Premiere where you arrange and edit video and other files.
Once you’re ready to import your footage, click the Import button.
Perform Simple Video Edits
After you’ve imported your footage with the Create new sequence setting toggled on, Premiere Pro dynamically places the video clips in a new sequence based on their name.
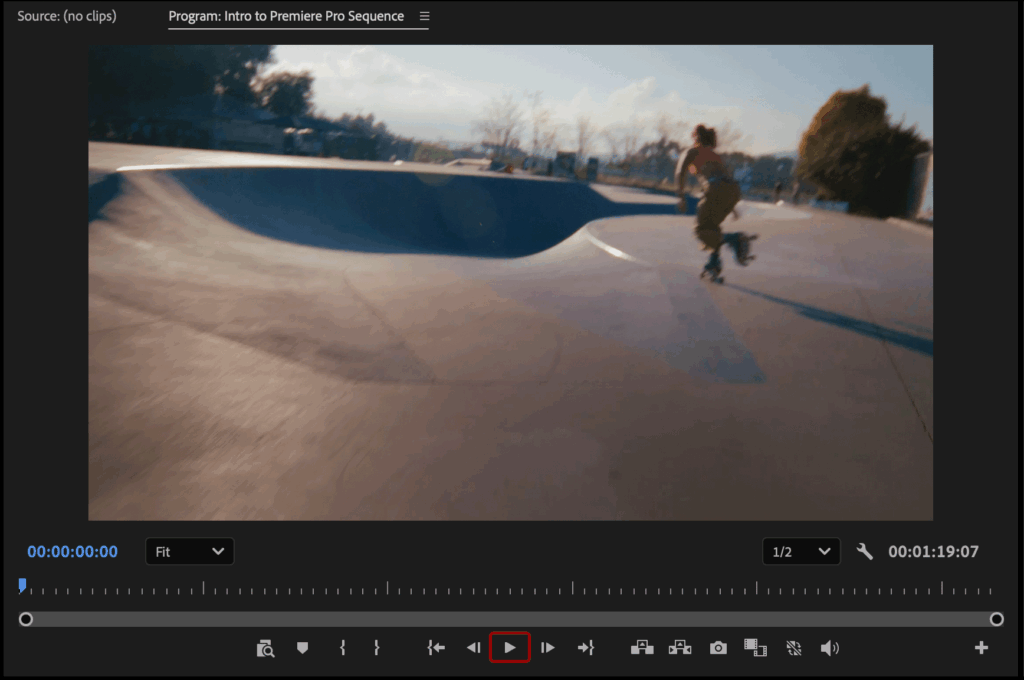
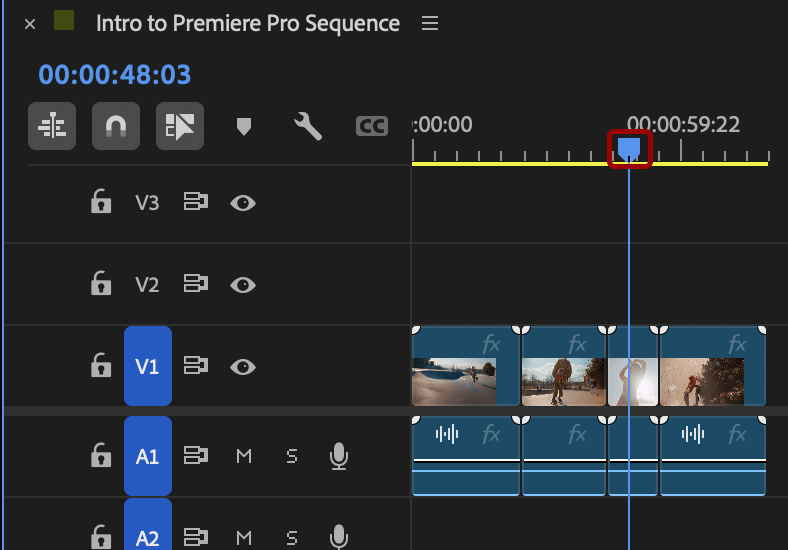
Click the play icon in the Program panel to play through the sequence starting at the playhead position. To change the playhead position, click, hold, and drag the playhead in the timeline.
Reorder Clips in the Timeline
To reorder video and audio clips, click, hold, and drag the clip to the desired location. For example, we moved Sample Media Clip 5 to the end of the sequence.
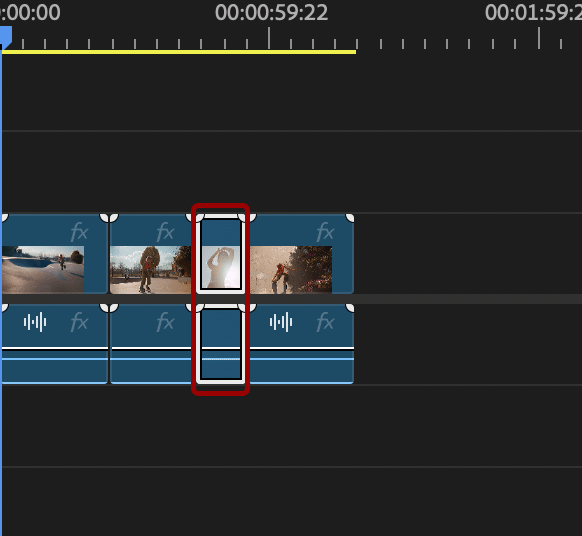
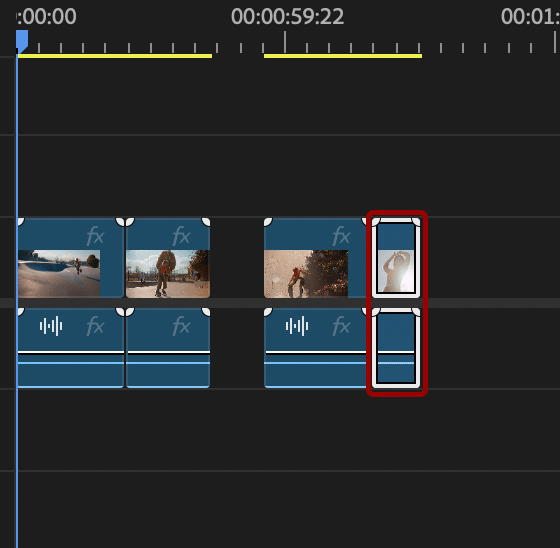
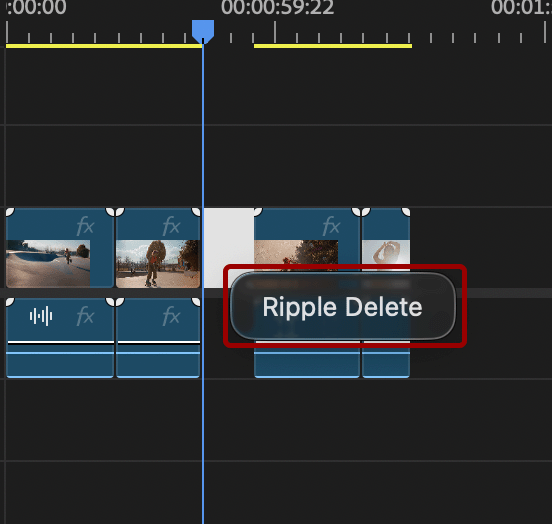
If you want to delete the gap left by moving the footage, click the gap in the timeline and select Delete on your keyboard. Alternatively, right-click the gap in the timeline and click Ripple Delete.
Cut Clips
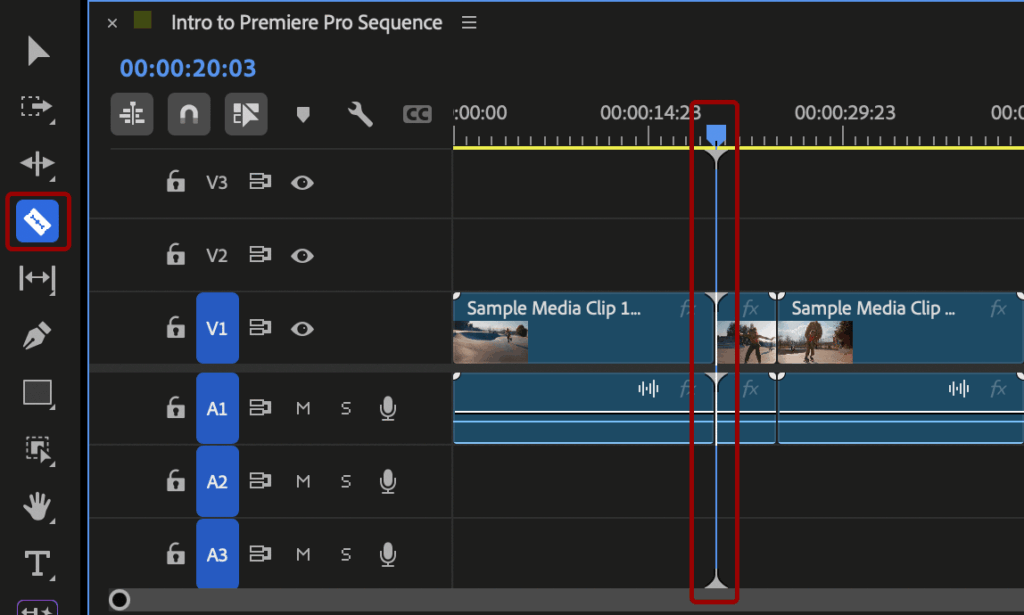
To cut a clip, select the Razor tool in the toolbar and then click on the clip where you want the cut. Alternatively, select C on your keyboard to activate the Razor tool.
The Razor tool separates the clip at the location you click. Now, you can move, delete, or edit the newly separated clips.
Add Video Transitions
Currently, all the clips in our timeline use a jump cut, a video editing technique where two shots of the same subject are placed sequentially. This causes the subject to appear to abruptly “jump” forward in time or position.
You can use various different video transition techniques to change how the video goes from one clip to the next.
To add a video transition:
- Navigate to the Effects panel. If you don’t see it, go to Window > Effects to activate it.
- Click the arrow to the left of the Video Transitions folder to open it.
- Click the arrow to the left of the Dissolve folder to open it.
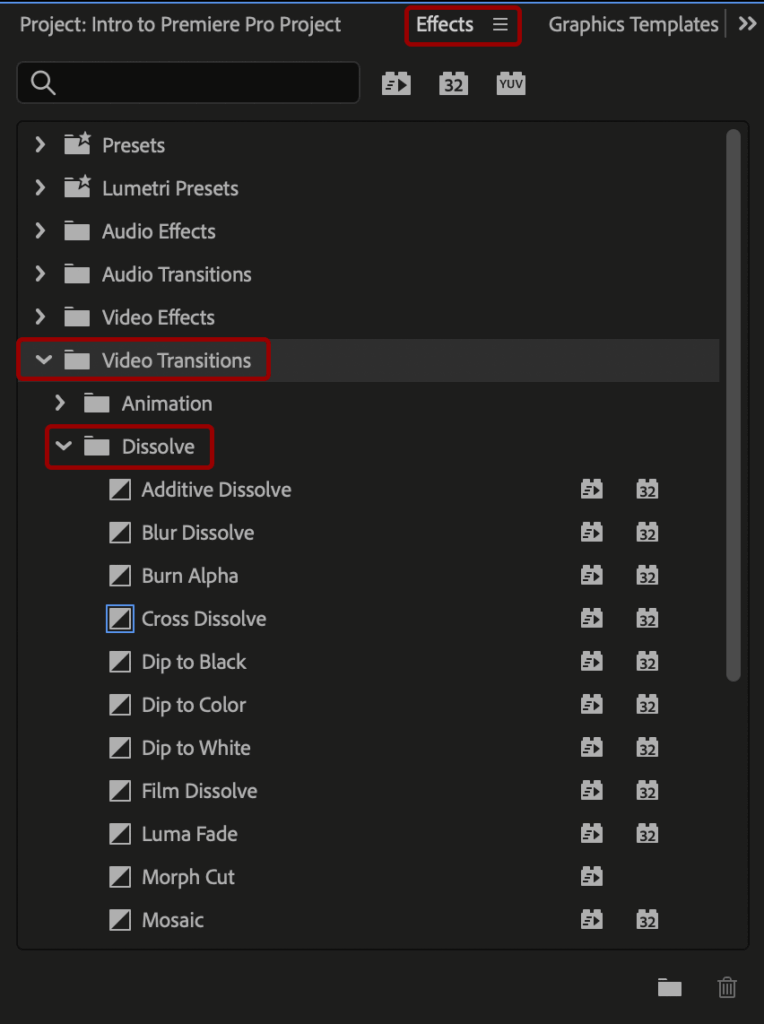
For this tutorial, we’ll use two different transitions in the Dissolve folder, but we encourage you to explore the other options available!
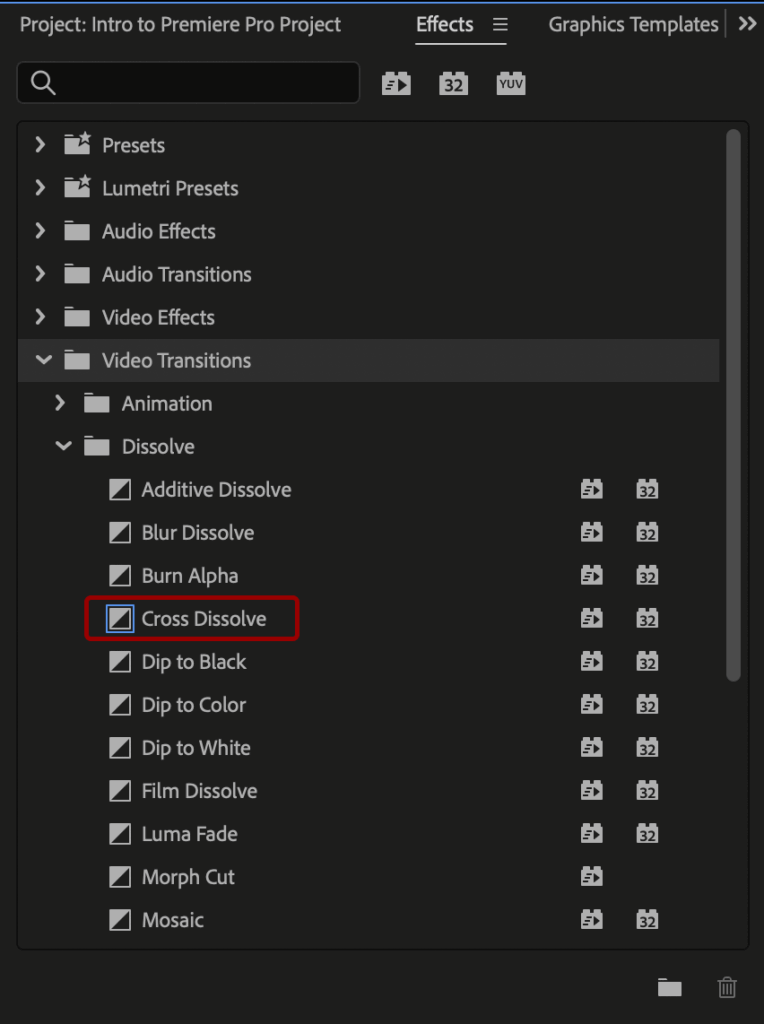
First, we’ll use the Cross Dissolve, which fades out the first clip and fades in the second clip at the same time.
Click and hold the Cross Dissolve transition. Drag and drop it on the timeline between the two clips you want to transition between.
To change the duration of the transition, click, hold, and drag the squares in the top-left and top-right corners of the transition layer.
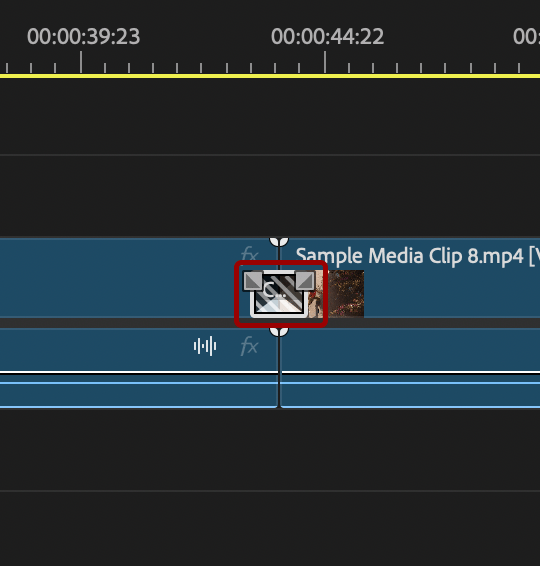
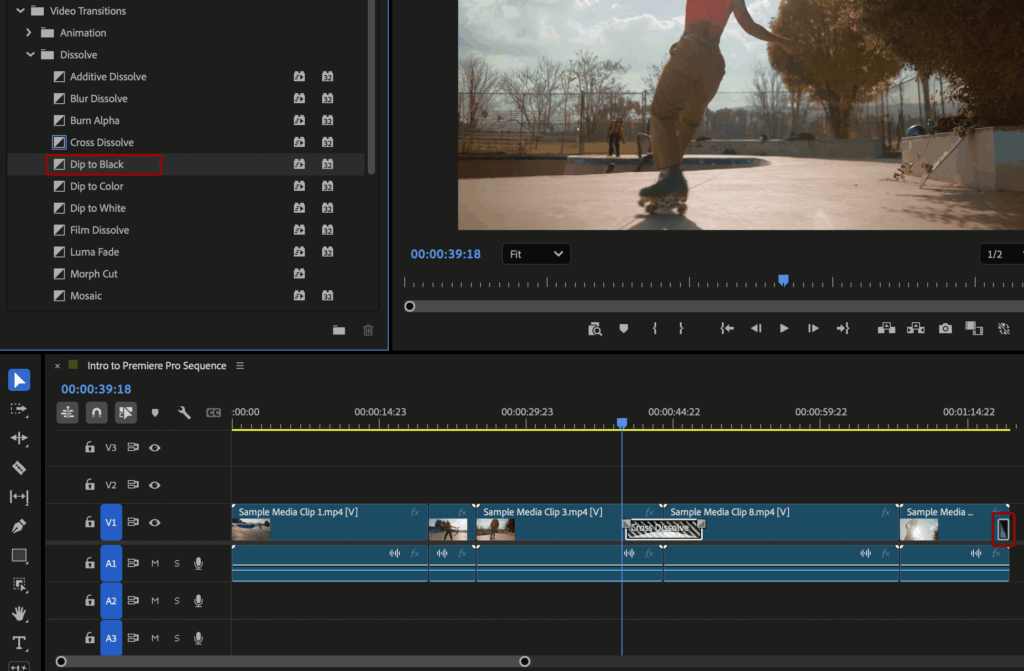
Next, we’ll end the video with a Dip to Black transition, which fades out the clip to a solid black screen.
Click and hold the Dip to Black transition. Drag and drop it on the timeline at the end of the clip. Remember, you can change the duration of the transition by moving the square in the top-left corner of the transition layer.
Change the Volume of Audio Clips
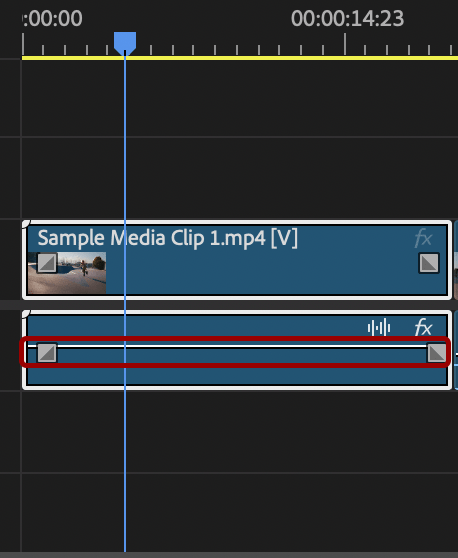
If you want to change the volume of audio clips, click and drag the white line on the audio track of the clip. Drag the line up to increase the volume and down to decrease the volume.
Alternatively, click on the clip in the timeline and navigate to the Properties panel. Under the Audio section, you can change the audio level by moving the slider position, entering a number in the decibel field, or selecting the Mute checkbox to completely mute the audio.
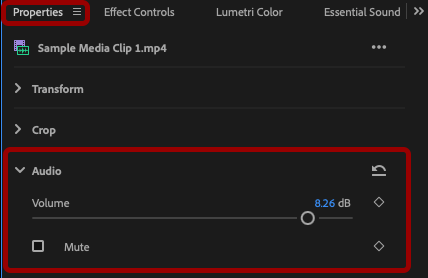
Please note that the sample media clips we’re using do not have any audio.
Color Correct Video Clips
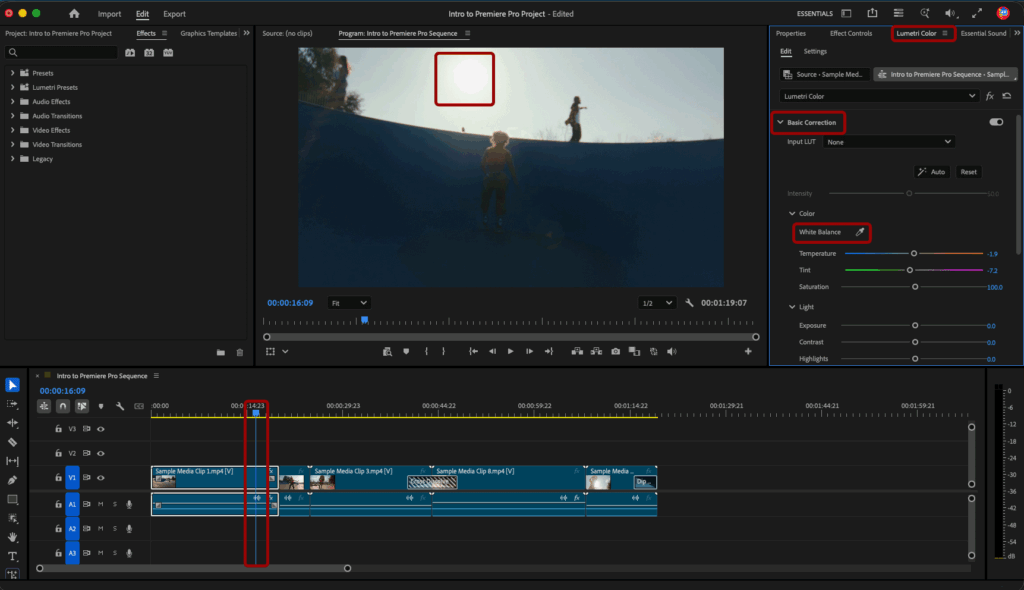
You can change the color of the video clip by using the tools in the Lumetri Color panel. Navigate to the Lumetri Color panel or activate it by navigating to Window > Lumetri Color.
Select the clip in your timeline and place the playhead to a location during the clip. This ensures you are viewing the clip in the Program panel that you’re changing the color of.
Click the arrow to the left of the Basic Correction group if it’s not already open.
The White Balance setting allows you to easily configure an appealing video color, based on the whitest area of the clip. Click the eyedropper icon by the White Balance setting and then click somewhere white in the video clip. This dynamically changes the Temperature, Tint, and Saturation levels to best match the clip.
Pro tip: If you’re recording your own video, record a few seconds of a blank, white card or piece of paper. Use the White Balance tool on the white card or paper while editing to get the best color correction for the lighting of the scene.
You can also manually adjust the Temperature, Tint, and Saturation levels by moving their respective sliders or entering a numeric value in the entry field.
Save and Export
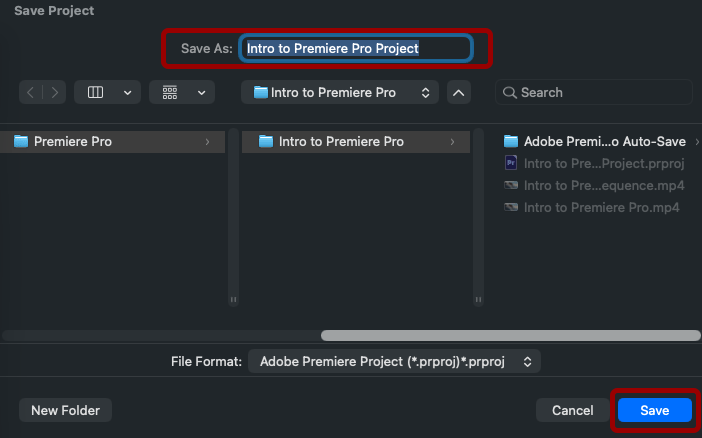
To save your Premiere Pro project, click File > Save As. In the Save Project popup:
- Enter the name of the file in the Save As field.
- Select where you want to save the project to.
- Click Save.
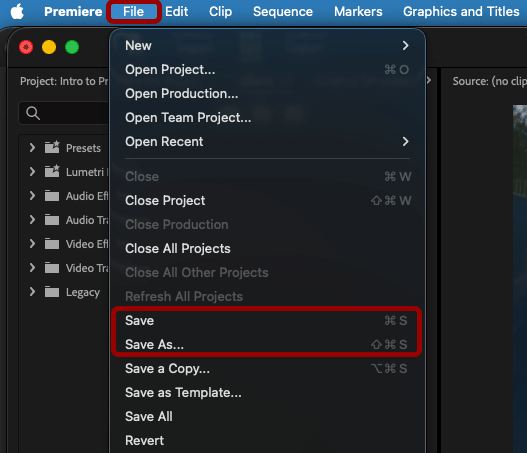
If you’ve already saved your project, you can either click File > Save or select COMMAND + S (Mac) or CONTROL + S (Windows) on your keyboard to save your updates.
This saves your Premiere Pro project so that you can reopen it later and continue editing.
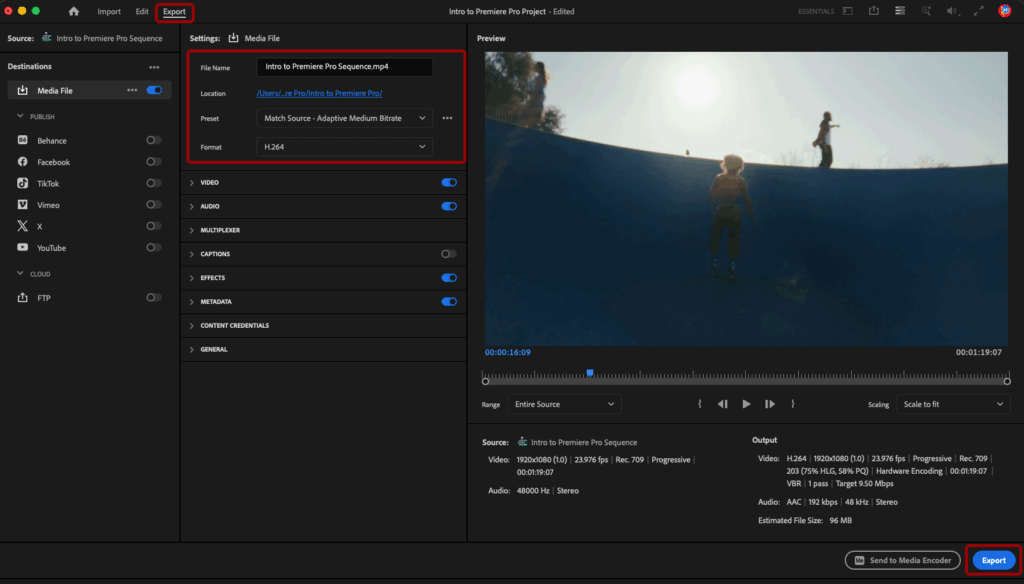
To export your project as a video:
- Click Export to navigate to the Export mode.
- Enter a file name in the File Name field.
- Click the link in the Location field to select where you’d like to export the video file to.
- Click the Preset dropdown to select a commonly used preset for export settings. For this tutorial, we’ve set the Preset to Match Source – Adaptive Medium Bitrate.
- If needed, change the value in the Format dropdown to change the exported video file format. H.264 is the most common and will export an MP4 file.
- Click the Export button.
Congratulations! You just edited your first video!
Final Result
Just went on vacation and want to post of video to social media? Check out our Make a Recap Video with Premiere Pro workshop!